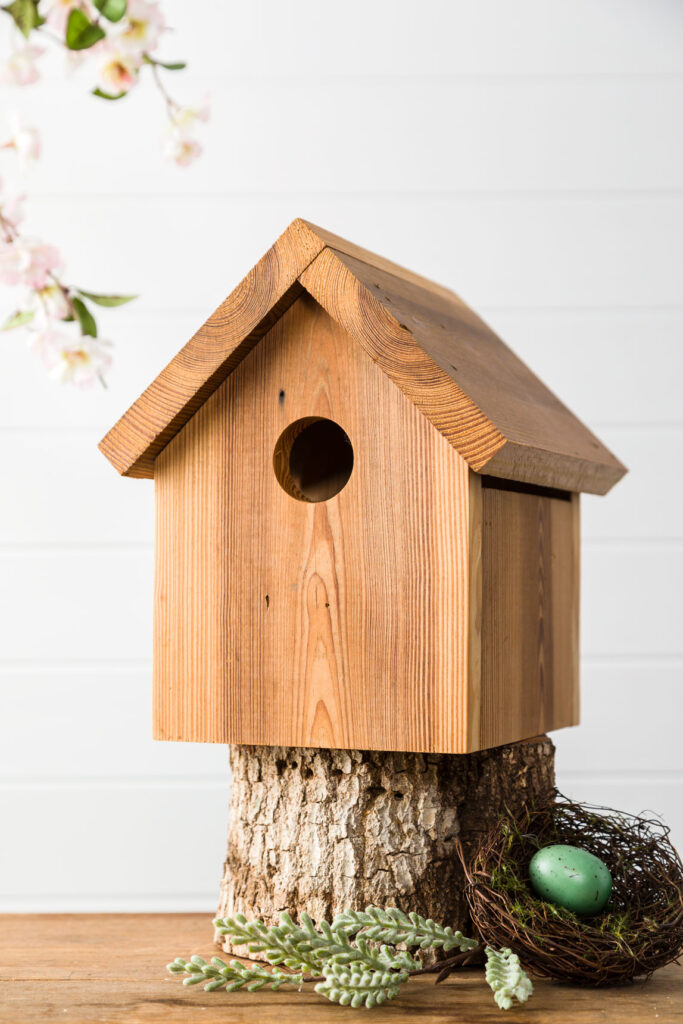
Alright, bird lovers, let's get crafty and build a birdhouse that's as stylish as it is functional. We're talking about a tiered roof, a design that adds a touch of architectural flair and gives your feathered friends a little extra protection from the elements. It's like giving them a mini mansion, but way more adorable.
Gather Your Tools and Materials:
First things first, let's round up everything we need to turn this birdhouse dream into a reality.
Wood: You've got options here. Pine or cedar are great choices because they're lightweight and weather-resistant. You can even go with reclaimed wood for an eco-friendly touch. We'll need some boards for the base, sides, roof, and the tiered pieces.
Screws: Wood screws, preferably in a size that's appropriate for the thickness of your wood.
Saw: A handsaw or circular saw will do the trick for cutting the wood to size.
Drill: We'll need this to pre-drill holes for the screws to prevent the wood from splitting.
Measuring Tape: Accuracy is key for a well-built birdhouse.
Pencil: For marking out your cuts and measurements.
Sandpaper: Smooth out any rough edges and make sure the inside is comfortable for our feathered friends.
Paint or Stain: Optional, but let's add a splash of personality!
Birdhouse Entry Hole: Get a pre-made one or use a drill bit to create a perfect hole.
Crafting the Birdhouse Base:
Let's start with the foundation. This is the bottom of the birdhouse, the base of our avian dwelling.
1. Measure and Cut: Decide on the dimensions of your birdhouse base. Keep in mind the size of the birds you want to attract. For smaller birds like chickadees and wrens, a base around 6 inches wide and 6 inches deep is a good starting point. For larger birds like bluebirds, you might want to increase the dimensions to around 8 inches by 8 inches.
2. Assemble the Base: Cut four pieces of wood to the desired length for the sides of the base. Use screws to attach them to create a square or rectangular box.
The Tiered Roof: A Touch of Architecture
Here's where the fun begins. The tiered roof adds a unique and stylish look to your birdhouse.
1. Cutting the Roof Tiers: Think of the tiered roof as a mini cake with two or more layers. Measure and cut two pieces of wood for the first tier of the roof. These pieces should be slightly larger than the base, creating a slight overhang. For the second tier, cut two pieces that are even slightly larger, so they overlap the first tier.
2. Attaching the Tiers: Use screws to attach the first tier of the roof to the base, ensuring there's a slight overhang on all sides. Then, attach the second tier of the roof, again with an overhang. You can add more tiers for a more dramatic look.
3. Securing the Roof: Use screws to connect the two tiers of the roof along the back edge, making sure they are securely attached.
Creating the Entryway:
Now it's time to give our birds a grand entrance.
1. Choosing the Location: Determine the best location for the entry hole. It should be centered on one of the sides of the birdhouse.
2. Cutting the Hole: Use a drill bit to create the entrance hole. The size of the hole will depend on the bird species you want to attract. For smaller birds, a 1.5-inch hole is suitable, while larger birds might require a 2-inch hole.
Adding Finishing Touches:
We're almost there, folks. Let's make this birdhouse really stand out.
1. Sanding: Smooth out any rough edges on the birdhouse with sandpaper. This will ensure the birdhouse is safe and comfortable for its future residents.
2. Painting or Staining: Get creative! Paint the birdhouse in a color scheme that complements your garden or choose a stain that brings out the natural beauty of the wood.
3. Ventilation: Drill a few small holes on the bottom of the birdhouse for ventilation. This will help keep the inside dry and prevent mold.
Finding the Perfect Spot:
Now that our birdhouse is complete, it's time to give it a home.
1. Location, Location, Location: Choose a spot that's protected from the elements, such as a tree branch or a sheltered area on a fence post.
2. Height: The birdhouse should be placed high enough to deter predators, but not so high that it's difficult for the birds to access.
3. Facing: Orient the birdhouse so that the entry hole faces away from prevailing winds.
Tips for Attracting Birds:
Nestling Materials: Provide some nesting materials near the birdhouse, such as dried grass, twigs, or feathers.
Water Source: Birds need water for drinking and bathing. Offer a shallow dish of water nearby.
Food Source: Plant native flowers and shrubs that provide seeds, berries, and insects.
Enjoy Your Stylish Birdhouse:
There you have it! Your beautifully crafted tiered-roof birdhouse is ready to welcome its feathered residents. Sit back, relax, and enjoy watching your new neighbors make themselves at home. Don't be surprised if you find yourself spending hours observing their busy little lives.
Building a birdhouse is not just a fun project, it's a way to connect with nature and provide a safe haven for birds in your backyard. So go ahead, get crafting, and let the birdsong fill your world with joy.


No comments:
Post a Comment
Note: Only a member of this blog may post a comment.