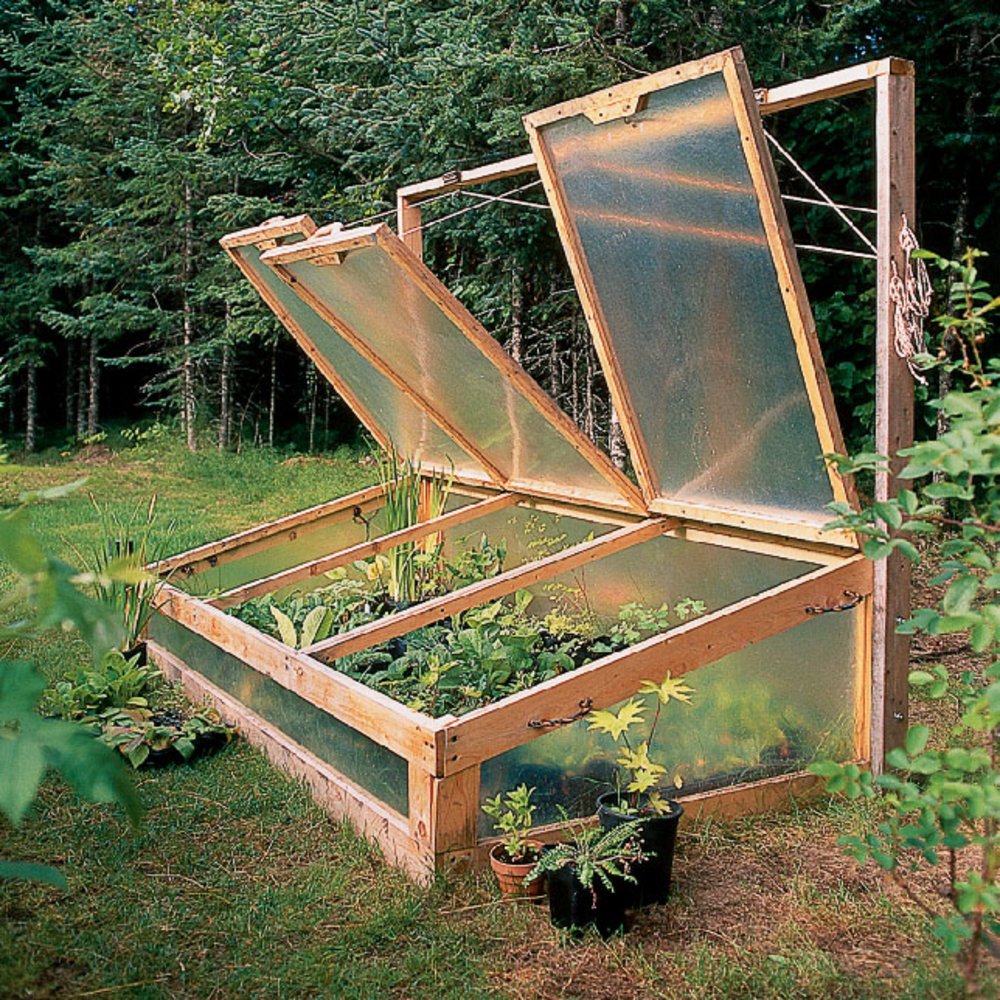
Building a Cold Frame for Extended Growth: A Step-by-Step Guide
Hey there, fellow gardening enthusiast! Are you tired of seeing your precious seedlings wither in the cold, harsh weather? Well, fear not! Building a cold frame is like giving your plants a cozy greenhouse haven, extending their growing season and giving you a head start on spring. Let’s dive in and build your very own cold frame!Why You Need a Cold Frame
Think of a cold frame like a mini-greenhouse, providing a warm and protected environment for your plants. Here’s the lowdown on why you should get one:
- Extend Your Growing Season: Cold frames act as a buffer against the cold, allowing you to start seeds earlier in spring and keep plants growing later into fall.
- Protect Plants from Frost: Those chilly nights won't be a problem with a cold frame. It traps warmth from the sun, shielding your seedlings from frost damage.
- Harden Off Seedlings: Gradually acclimating your seedlings to the outdoors is essential, and a cold frame is the perfect place to do it.
- Provide a Safe Haven: A cold frame acts as a barrier against hungry pests and critters, keeping your plants safe and sound.
Types of Cold Frames
There are a few different ways to go about building a cold frame, depending on your budget, materials, and desired size.
DIY Cold Frames:
If you're looking for a fun project and love the satisfaction of creating something from scratch, these are your best bets.
- Wooden Cold Frame: A classic choice, these cold frames offer durability and can be customized to your needs.
- Brick Cold Frame: For a more permanent and rustic look, consider building with bricks.
- Recycled Materials Cold Frame: Get creative with recycled materials like windows, pallets, or even old barrels! It's a great way to repurpose items and save money.
Pre-Made Cold Frames:
If DIY isn’t your thing, pre-made cold frames are a great option. You can find them in a variety of sizes and materials, ready to be assembled and placed in your garden.
Choosing the Right Location
The location you choose for your cold frame will significantly impact its effectiveness. Here are some important factors to consider:
- Sunlight: A south-facing location is ideal for maximum sunlight exposure. This ensures your plants get the warmth they need for growth.
- Drainage: Make sure your cold frame is situated on well-drained soil to prevent waterlogging and root rot.
- Accessibility: Choose a spot that is easy to reach and allows for convenient access for watering, tending, and harvesting.
Building a Wooden Cold Frame: A Step-by-Step Guide
Let's build a simple, yet effective wooden cold frame. You’ll need the following materials:
- Wood: Use pressure-treated lumber for durability, especially if you plan to keep the cold frame outdoors year-round. You'll need 2x4s for the frame, 1x12s for the top and bottom, and optional trim for a finished look.
- Screws: Use exterior-grade screws for long-lasting strength.
- Hinges: These will allow you to open the lid for ventilation and access.
- Glass or Polycarbonate Sheet: This will act as the cover for your cold frame. Glass is classic, while polycarbonate is lighter and more shatter-resistant.
- Silicone Sealant: This will help create a watertight seal between the frame and the cover.
- Paint or Stain (Optional): Protect your wood from the elements with a coat of paint or stain.
Step 1: Building the Frame
Using the 2x4s, construct a rectangular frame. You can adjust the dimensions to your liking. Remember to leave some overhang for the lid.
Step 2: Attaching the Top and Bottom
Attach the 1x12s to the frame using screws. One will form the bottom of your cold frame, and the other will be the lid.
Step 3: Adding Hinges and Handles
Attach the hinges to the back of the lid and the frame, making sure they are strong enough to support the weight of the cover. Add a handle to the lid for easy opening and closing.
Step 4: Installing the Cover
If you're using glass, cut it to size and secure it to the lid using silicone sealant. If using polycarbonate, make sure it's cut to the correct dimensions and attach it using the appropriate fasteners.
Step 5: Finishing Touches
Apply paint or stain to protect the wood, and add any decorative elements you wish. Now you have a beautiful, functional cold frame!
Using Your Cold Frame
Here are some tips for getting the most out of your cold frame:
- Ventilation: Proper ventilation is crucial. Open the lid on sunny days to prevent overheating and excessive humidity. On cold nights, close the lid to trap warmth.
- Watering: Keep the soil moist but not soggy. Water thoroughly when needed, avoiding overwatering.
- Soil: Use a well-draining potting mix suitable for your plants. Consider adding compost or other amendments for extra nutrients.
- Monitoring: Regularly check the temperature inside your cold frame. Make sure it’s not getting too hot or too cold for your plants.
- Hardening Off: Once your seedlings are strong enough, gradually acclimate them to outdoor conditions by opening the lid for longer periods each day.
That’s it! You’ve now got a cold frame to protect your precious plants, extend your growing season, and enjoy fresh, homegrown produce for longer.
Happy gardening!


No comments:
Post a Comment
Note: Only a member of this blog may post a comment.