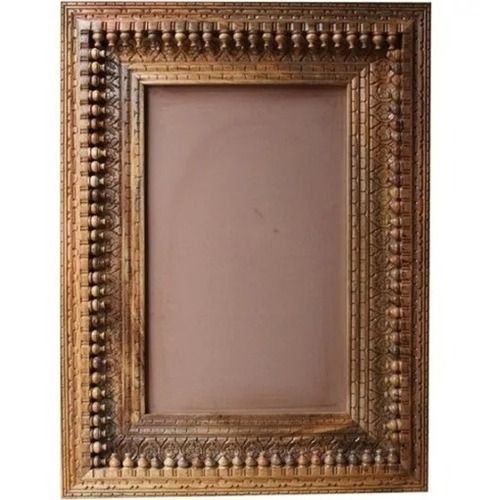
Alright, let's get our hands dirty and build a picture frame! You know how it is, you've got these amazing photos gathering dust on your phone, just begging to be showcased. And what better way to do that than with a handcrafted wooden frame? It's not rocket science, trust me. In fact, it's a fun little project that even a DIY novice can tackle. Plus, it's super satisfying to see your finished product, holding those special memories.
Let's talk tools first. You don't need a whole woodworking shop to make this happen. You'll be fine with the basics:
A saw: A handsaw will do the trick, but a miter saw will make things a whole lot easier, especially if you want those perfect 45-degree angles for a fancy mitered frame.
Sandpaper: You'll need some grit for smoothing out the rough edges.
A measuring tape: You'll need this to get the dimensions right.
A pencil: For marking those cuts.
Wood glue: To stick everything together.
Clamps: To hold your frame together while the glue dries.
A screwdriver or drill: If you plan on using screws or nails.
Optional: A router, if you want to add some fancy edges.
Now for the wood itself. Think about the photos you want to display. Do you want a simple, rustic frame? Go for some rough-cut pine. Want something more elegant? Maybe mahogany or walnut.
Once you've got your tools and wood, you can start the fun part: designing your frame.
Measure your photo. This will determine the overall size of your frame.
Decide on your frame thickness. You can go with a simple 1/2 inch thick frame, or you can go thicker for a more substantial feel.
Choose your frame style. You can do a simple rectangular frame, a mitered frame with angled corners, or you can get fancy with a more elaborate design.
Let's say you're going with a simple rectangular frame.
1. Cut your wood pieces. Using your saw, cut four pieces of wood to the same length. These will be the sides of your frame. Then, cut two pieces of wood to the width of your photo. These will be the top and bottom of your frame.
2. Sand the edges. Use sandpaper to smooth out the rough edges of your wood pieces. This will make your frame look much nicer and prevent splinters.
3. Assemble the frame. Use wood glue to join the pieces of wood together. You can also use small nails or screws, especially if you're going with a thicker frame. Make sure to apply even pressure and clamp the frame together until the glue dries.
4. Finishing touches: You can stain or paint your frame after it dries. This will give your frame a more polished look and protect the wood.
5. Add your photo. Once the frame is dry, you can put your photo in place.
And there you have it! You just built a wooden frame for your favorite photos.
Here are some ideas to make your frame even more special:
Go for a distressed look: You can create a weathered, rustic look by sanding the wood with steel wool, applying a coat of paint, and then sanding it off in certain areas.
Add decorative elements: Get creative with wood burning, etching, or even decoupage to personalize your frame.
Make it functional: You could add a kickstand to the back of the frame, so it can stand on its own.
Get fancy with the back: Instead of using cardboard, make a backing for the frame from a patterned fabric or a piece of wood with a contrasting color.
And let's talk about those pictures you're framing! You can go with a theme, like a collection of landscape shots from your last road trip, or a series of portraits of your favorite people. Or maybe you just want to frame that hilarious photo of your cat wearing a tiny hat. Whatever it is, make it personal!
Building a picture frame might seem like a small thing, but it's really about celebrating the moments that matter. When you look at that finished frame, with its carefully chosen photos, you're not just admiring the craftsmanship. You're remembering those special moments, those little victories, those laughs shared with the people you love. It's a reminder of the stories you're creating, and the legacy you're building, piece by piece.
So, pick up your tools, grab some wood, and start building! You never know, you might discover a hidden talent for woodworking, or at the very least, have a whole lot of fun. And remember, the beauty is in the details, so don't be afraid to let your creativity flow! Happy framing!


No comments:
Post a Comment
Note: Only a member of this blog may post a comment.