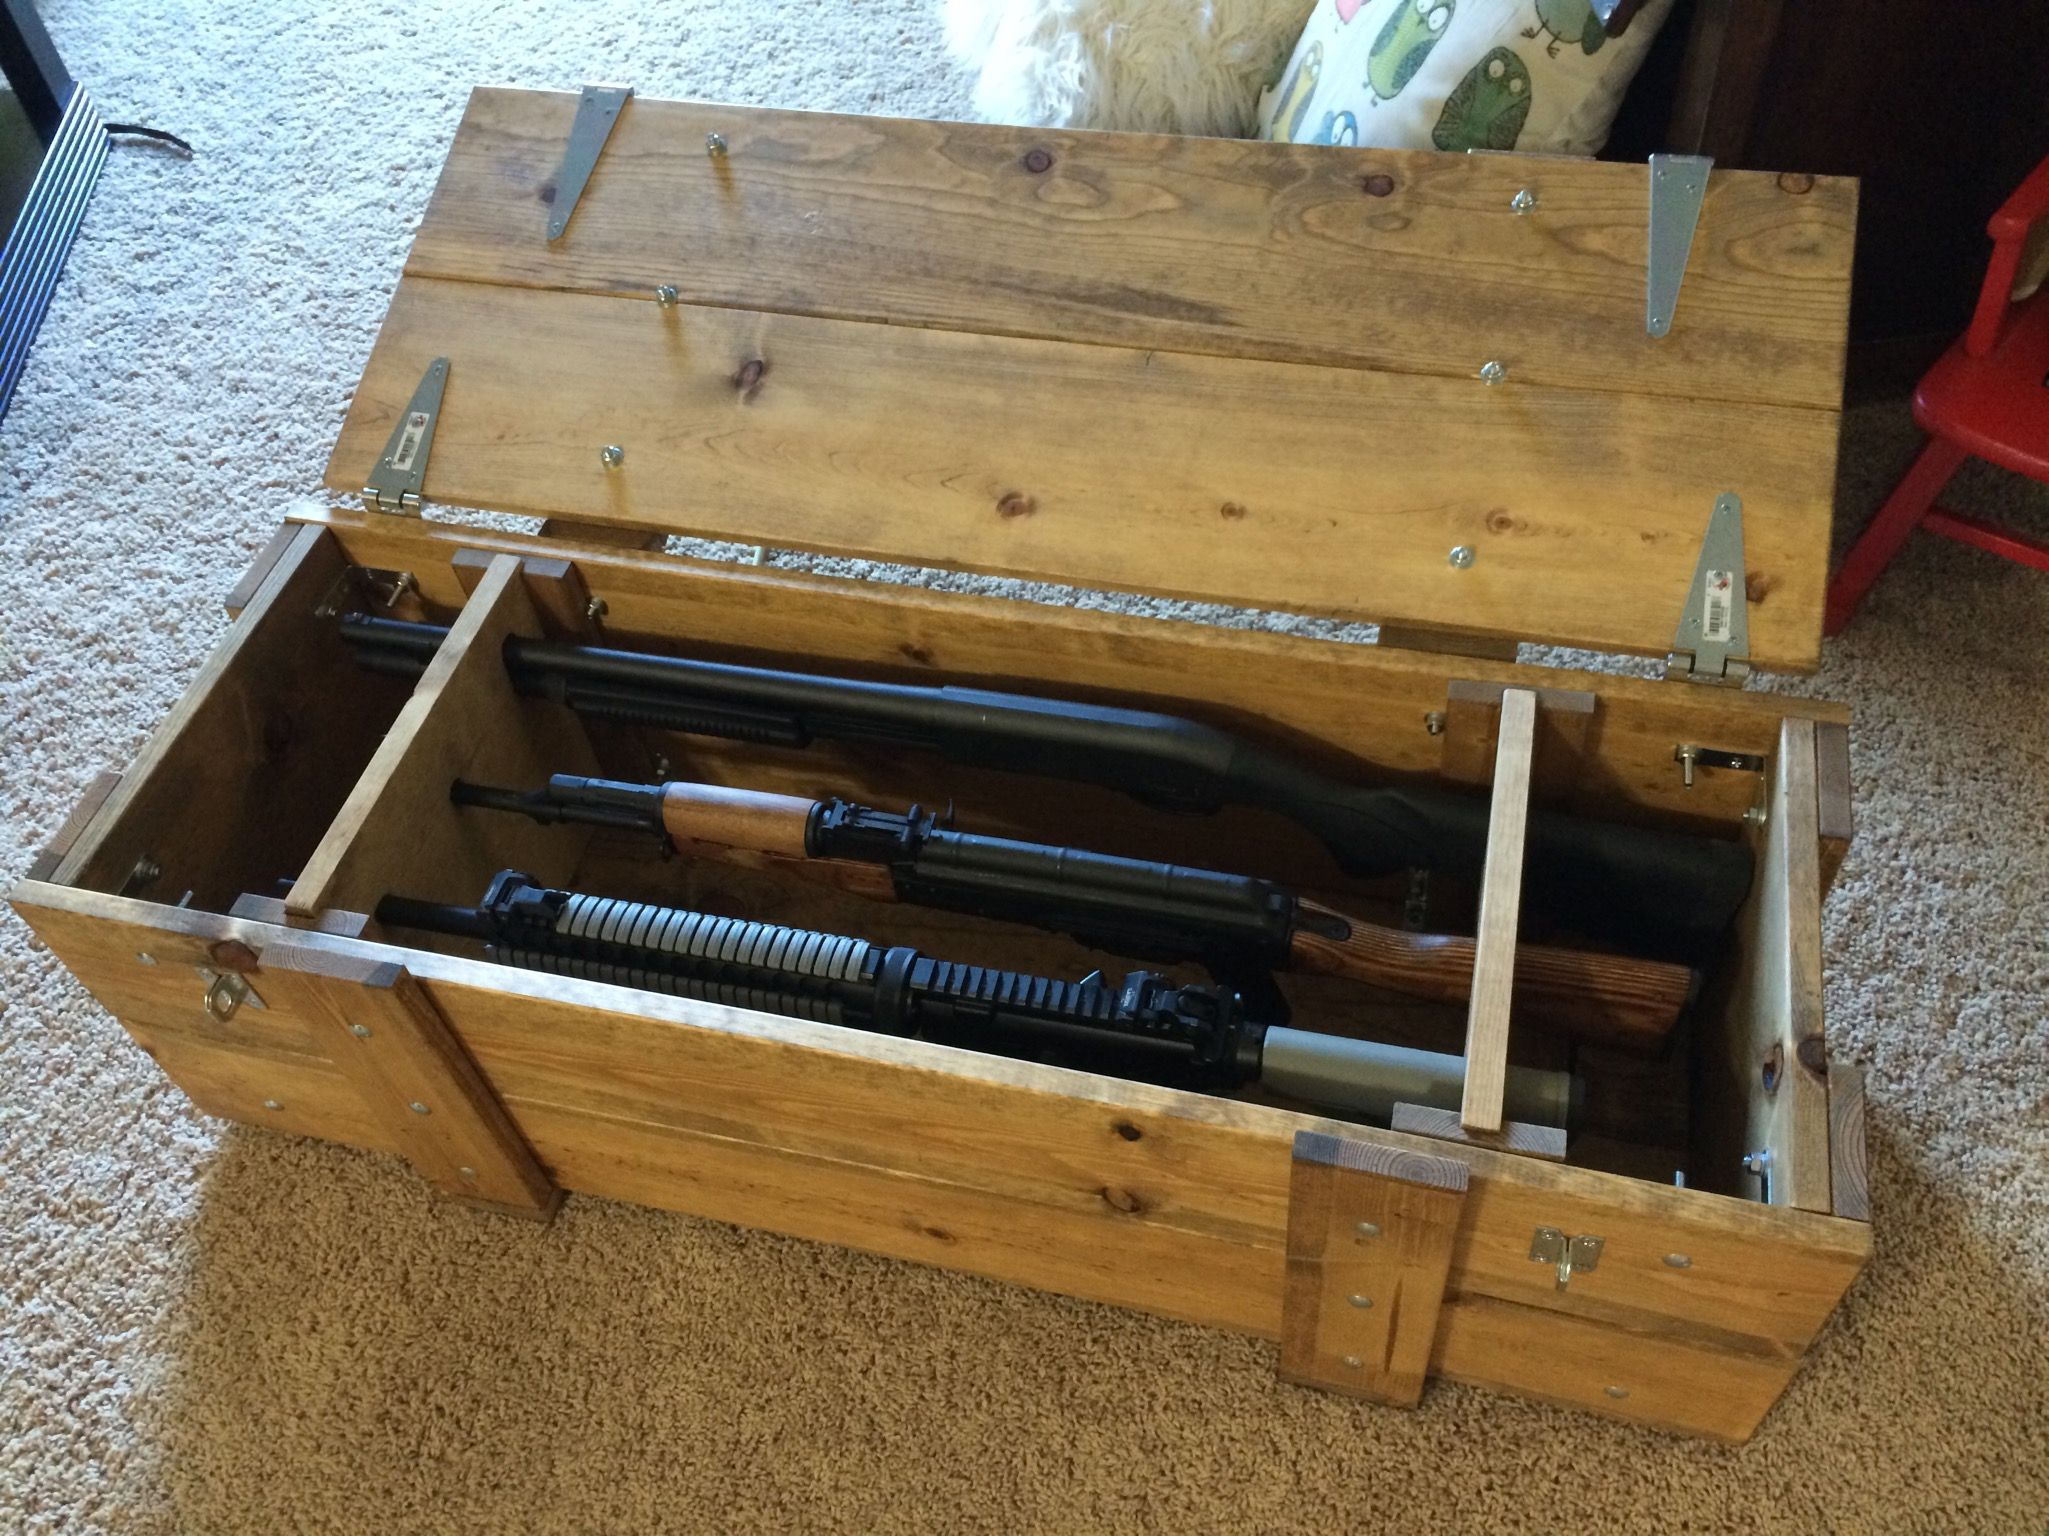
For firearm enthusiasts, a well-organized and protected storage solution is paramount. While commercially available gun cases offer convenience, crafting a bespoke wooden gun case allows for personalized customization, a touch of craftsmanship, and a sense of pride in ownership. This article provides a comprehensive guide to constructing a sturdy, aesthetically pleasing wooden case specifically designed for a small-scale firearm collection.
I. Planning and Design:
1. Determine the Dimensions and Capacity:
Firearm Inventory: A detailed inventory of the firearms to be stored is crucial. Measure the length, width, and height of each firearm, including any optical sights or accessories. Consider the possibility of future additions to the collection.
Case Dimensions: Based on the firearm dimensions, calculate the interior dimensions of the case. Allow for ample space between firearms for safe handling and prevent rubbing.
Exterior Dimensions: Factor in the thickness of the wood, any additional features like hinges, latches, and interior lining. The final exterior dimensions will determine the size and portability of the case.
2. Choose the Wood:
Durability: Opt for a strong hardwood like walnut, cherry, maple, or oak. These woods are known for their durability, resistance to scratches and dents, and ability to withstand the weight of firearms.
Aesthetics: Consider the color, grain pattern, and texture of the wood. Matching the wood species to the style of the firearms can enhance the visual appeal of the case.
Accessibility: While solid hardwoods offer superior durability, plywood can provide an economical alternative with a less-demanding construction process.
3. Sketch the Design:
Layout: Draw a detailed plan of the case, specifying the interior layout, compartments, and any additional features like dividers, locks, and hinges.
Exterior Style: Consider the overall shape of the case, the desired level of ornamentation, and the inclusion of decorative elements like inlays or carvings.
4. Select Hardware:
Hinges: Robust brass or stainless steel hinges ensure smooth opening and closing and resist corrosion.
Latches: Choose secure and durable latches that can be easily opened but resist tampering.
Locks: Depending on the desired level of security, consider installing a high-quality lock mechanism.
Interior Lining: Felt or velvet lining adds a touch of elegance and protects the firearm finishes.
II. Construction:
1. Cutting and Shaping:
Precise Measurements: Accurately cut the wooden panels based on the design sketch and ensure all edges are square and clean.
Joinery: For superior strength and durability, consider using traditional joinery methods like mortise and tenon or dovetail joints.
Shaping: If the design includes curved edges or intricate details, use hand tools or a router to shape the wood to the desired form.
2. Assembling the Case:
Glue and Fasteners: Apply wood glue to the joints and secure with screws or nails. Ensure that all joints are flush and the assembly is square.
Clamping: Use clamps to apply even pressure and ensure a strong, lasting bond.
Sanding: After the glue has dried, sand the case smooth using progressively finer grits of sandpaper to remove any rough edges or imperfections.
3. Adding Interior Features:
Dividers: Cut and install dividers using wood or other sturdy materials like acrylic. These dividers create separate compartments to organize the firearms.
Padding: Line the interior of the case with felt or velvet padding to protect the firearm finishes and prevent movement during transport.
Accessories: Consider adding compartments for cleaning supplies, ammunition, or other firearm-related accessories.
4. Installing Hardware:
Hinges: Attach the hinges to the case lid and the body, ensuring they are aligned and allow for smooth opening and closing.
Latches and Locks: Mount the latches and locks securely on the case lid and body, taking care to align them properly for secure fastening.
5. Finishing:
Stain or Paint: Apply a stain or paint of your choice to enhance the wood's natural beauty or create a desired aesthetic.
Sealing: Seal the case with a clear varnish or polyurethane to protect the finish from scratches and spills.
Polishing: For a high-gloss finish, consider applying a polishing compound and buffing the case with a soft cloth.
III. Safety and Security:
Firearm Storage: Store the firearms in a secure location away from unauthorized access.
Ammunition Storage: Store ammunition separately from the firearms, preferably in a locked container.
Firearms Safety: Always follow basic firearms safety rules and ensure the firearm is unloaded and secured with a trigger lock before storage.
IV. Final Touches:
Personalization: Consider adding a personalized touch to the case with engraving, carving, or a custom nameplate.
Organization: Store the case in a well-ventilated and dry location.
Regular Maintenance: Periodically inspect the case for wear and tear and apply touch-up finishes as needed to maintain its aesthetic appeal.
Conclusion:
Constructing a bespoke wooden gun case requires careful planning, meticulous craftsmanship, and a commitment to safety. This project offers a unique opportunity to create a custom storage solution that showcases your firearm collection and reflects your personal style. By following the steps outlined in this guide, you can transform your gun case into a testament to your passion and craftsmanship.


No comments:
Post a Comment
Note: Only a member of this blog may post a comment.