Sharing the secrets of woodcraft, from detailed joinery to creative finishes.

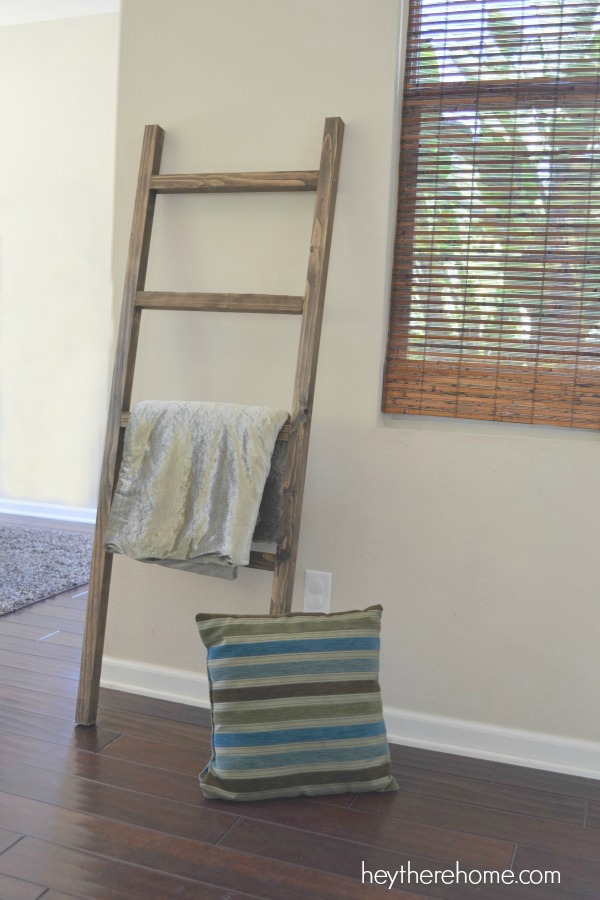
How to Make Blanket Ladders for Rustic and Modern Spaces

How to Make Blanket Ladders for Rustic and Modern Spaces

How to Make Blanket Ladders for Rustic and Modern Spaces

Blanket ladders offer a charming and practical solution for organizing and displaying throws, quilts, and other cozy textiles. They add a touch of rustic charm to any space, seamlessly blending into both modern and traditional aesthetics. This guide will walk you through the step-by-step process of constructing a blanket ladder, equipping you with the knowledge and skills to craft a personalized and functional piece for your home.

Choosing Materials and Tools

The first step in constructing a blanket ladder is selecting the right materials and tools. The choice of materials will greatly influence the final look and feel of the ladder, while the tools ensure a smooth and successful construction process.

Materials

  • Wood: Opt for sturdy wood like pine, oak, or cedar. The thickness of the wood will impact the sturdiness and overall aesthetic. Consider using 1x2 or 1x3 lumber for the rungs and 1x4 or 1x6 lumber for the sides.
  • Screws: Choose wood screws that are long enough to securely fasten the rungs to the sides. Wood glue can be used for added stability and to prevent loosening over time.
  • Stain or Paint: Select a stain or paint that complements the existing decor of your space. Consider using a natural stain to enhance the wood grain or a bright paint to create a bold statement.
  • Hardware: If you want to add a decorative touch or enhance the ladder's functionality, consider incorporating hooks, brackets, or shelves. These elements can be used for hanging other items besides blankets.

Tools

  • Measuring Tape: Accurate measurements are crucial for creating a well-proportioned and balanced ladder. Use a measuring tape to determine the desired height and width of the ladder.
  • Saw: Choose a saw that is suitable for cutting the wood to your specified measurements. A hand saw, circular saw, or miter saw are all viable options.
  • Drill: A drill is essential for creating pilot holes before inserting screws, ensuring cleaner and stronger joints. Use a drill bit that is slightly smaller than the diameter of the screws.
  • Screwdriver: A screwdriver or drill with a screwdriver bit is needed to securely fasten the screws. Consider using a magnetic bit for easier handling.
  • Sandpaper: Sanding the wood before staining or painting helps achieve a smooth finish and creates a better surface for the coating to adhere to.
  • Level: Ensuring that the ladder is perfectly level is crucial for stability and aesthetics. Use a level to verify that each rung is positioned horizontally and the sides are vertical.

Step-by-Step Construction Guide

Now that you have gathered the necessary materials and tools, follow these step-by-step instructions to construct your blanket ladder:

1. Cut the Wood

  • Measure and cut the two side pieces of the ladder to the desired height. Ensure that both pieces are the same length.
  • Measure and cut the rungs to the desired width. It's recommended to have at least four rungs for a stable and functional ladder.
  • Use a level to ensure that the cuts are precise and the wood is straight.

2. Sand the Wood

  • Sand all the wood surfaces, including the sides and rungs, to achieve a smooth and consistent finish. This step helps to remove any rough edges or splinters and creates a better surface for staining or painting.
  • Use sandpaper with varying grits, starting with a coarser grit for rough sanding and finishing with a finer grit for a smooth finish.

3. Stain or Paint the Wood

  • Apply a stain or paint to the wood surfaces, following the manufacturer's instructions. Allow the coating to dry completely before proceeding to the next step.
  • Multiple coats may be necessary to achieve the desired color and opacity. Ensure that each coat is completely dry before applying the next one.

4. Assemble the Ladder

  • Position the two side pieces vertically, parallel to each other, and at the desired distance apart. You can use a level to ensure that they are perfectly aligned. The distance between the sides determines the depth of the ladder.
  • Using a pencil, mark the positions for the rungs on the sides. Ensure that the rungs are spaced evenly and at a comfortable height for accessing blankets.
  • Pre-drill pilot holes at the marked positions on the sides, using a drill bit slightly smaller than the diameter of the screws. This step prevents the wood from splitting when screws are inserted.
  • Attach the rungs to the sides using screws and wood glue. Ensure that the rungs are securely fastened to the sides for stability.
  • Use a level to ensure that each rung is perfectly horizontal and the sides are vertical. Adjust the rungs as needed to achieve a balanced and level ladder.

5. Add Optional Hardware

  • If desired, install hooks, brackets, or shelves to enhance the ladder's functionality and add a decorative touch.
  • Ensure that the hardware is securely attached to the ladder and that it is positioned to avoid interfering with the use of the ladder for blankets.

Finishing Touches and Tips

Once the blanket ladder is assembled, you can add finishing touches to personalize it and make it more appealing.

Tips for Personalization

  • Use unique hardware: Incorporate decorative hooks, brackets, or shelves made from different materials like metal, leather, or rope. These additions can add a touch of rustic charm or a modern flair.
  • Decorate the rungs: Wrap the rungs with rope, twine, or fabric for a more textured look. You can also create stencils and paint patterns onto the rungs for a personalized touch.
  • Add a decorative top: Craft a decorative top for the ladder using wood, metal, or other materials. You can also add a small planter or a shelf to display decorative items.
  • Use different stains or paints: Experiment with different wood stains or paints to achieve a unique finish. Consider using a distressed paint technique to create a vintage look or a bold paint color for a contemporary statement.

Tips for Placement

  • Place near a seating area: Position the blanket ladder near a sofa, armchair, or bed for easy access to throws and quilts.
  • Consider the lighting: Place the ladder in a well-lit area to showcase the blankets and allow for easy viewing of the details.
  • Use as a room divider: A blanket ladder can effectively divide a room into distinct zones. Consider placing it strategically to create a separate seating area or a cozy reading nook.

Conclusion

Building a blanket ladder is a fulfilling project that allows you to personalize your home with a functional and stylish piece of furniture. By following these steps, you can craft a charming and practical ladder that will add warmth and character to any room. Remember to choose materials and tools that align with your desired aesthetic and consider incorporating personalized touches to create a truly unique piece.

Share:

Simple Bath Tray Woodworking Ideas That Sell Fast

Simple Bath Tray Woodworking Ideas That Sell Fast

Simple Bath Tray Woodworking Ideas That Sell Fast

In the world of woodworking, crafting functional and aesthetically pleasing pieces is highly rewarding. Bath trays, in particular, have gained immense popularity due to their practicality and ability to elevate the bathroom experience. If you're looking for woodworking projects that are both simple to construct and highly marketable, consider these bath tray ideas that are sure to sell fast:

Essential Features of a Successful Bath Tray

Before diving into specific designs, it's crucial to understand the key features that make a bath tray desirable and functional:

Sturdy Construction

A well-crafted bath tray should be able to hold the weight of books, candles, snacks, and even a glass of wine without bending or breaking. Choose durable wood species like cedar, redwood, or maple for their strength and resistance to moisture.

Comfortable Grip

A bath tray should have a secure grip that prevents it from slipping and sliding in the tub. You can achieve this by incorporating raised edges, rubber feet, or strategically placed handles.

Ample Storage Space

The tray should have sufficient space to accommodate the user's belongings. This can be achieved through compartments, shelves, or even a built-in wine glass holder.

Stylish Design

The aesthetic appeal of a bath tray is equally important. Consider using natural wood finishes, decorative elements like brass accents, or even adding a touch of personalization through engraving.

Simple Bath Tray Ideas That Sell Fast

Here are some simple yet effective bath tray designs that are guaranteed to attract buyers:

Classic Rectangular Bath Tray

This timeless design is versatile and easily adaptable to different bathroom styles. The tray can be made from a single piece of wood or assembled from multiple sections. Incorporate features like a built-in book holder, a recessed area for a glass of wine, or a dedicated space for a candle.

Tiered Bath Tray

Add extra storage capacity with a tiered bath tray. The upper tier can hold smaller items like candles or snacks, while the lower tier accommodates larger books or tablets. Consider using contrasting wood species for the tiers to create a visually appealing effect.

Bath Tray with Storage Drawer

For those seeking additional storage, a bath tray with a drawer can be a practical solution. The drawer can be used to store bath salts, essential oils, or other bathroom essentials. You can integrate the drawer seamlessly into the tray design or use a sliding mechanism for easy access.

Folding Bath Tray

A folding bath tray offers space-saving convenience. This design allows the tray to be folded flat when not in use, making storage easier. You can create a simple folding mechanism with hinges or use a more intricate design with a locking system.

Bath Tray with Built-in Book Holder

For bookworms who enjoy relaxing in the bath, a bath tray with a built-in book holder is a perfect choice. You can create a dedicated compartment for holding books securely or incorporate a simple angled design that allows for easy reading.

Tips for Selling Your Woodworking Creations

Once you've crafted your bath trays, it's time to find buyers. Here are some tips to help you sell your woodworking creations:

High-Quality Photography

Invest in high-quality photography to showcase your bath trays in the best possible light. Use natural lighting, a clean background, and focus on highlighting the details and craftsmanship.

Targeted Online Marketplaces

List your bath trays on online marketplaces like Etsy, Amazon Handmade, or Facebook Marketplace. These platforms offer a wide audience of potential buyers who are actively seeking handcrafted items.

Local Craft Fairs and Markets

Participate in local craft fairs and markets to connect with customers in person. This allows you to showcase your work, answer questions, and build relationships with potential buyers.

Social Media Marketing

Utilize social media platforms like Instagram and Pinterest to create visual content that highlights your woodworking skills and the beauty of your bath trays. Share behind-the-scenes glimpses of your process and engage with potential customers.

Word-of-Mouth Marketing

Don't underestimate the power of word-of-mouth marketing. Encourage satisfied customers to spread the word about your products through referrals and online reviews.

Conclusion

Simple bath tray woodworking projects can be both profitable and fulfilling. By focusing on functionality, aesthetic appeal, and marketing your creations effectively, you can turn your woodworking passion into a thriving business. Embrace the opportunity to create beautiful and practical pieces that enhance the bathroom experience and bring joy to your customers.

Share:

How to Craft Wooden Pencil Holders with a High-End Finish for Luxury Spaces

How to Craft Wooden Pencil Holders with a High-End Finish for Luxury Spaces

Elevate Your Space: Crafting Exquisite Wooden Pencil Holders for Luxury Environments

In the realm of interior design, meticulous attention to detail elevates the ordinary to the extraordinary. While functionality is paramount, it is the artful integration of exquisite pieces that truly define a space as luxurious. Among such meticulously crafted elements, wooden pencil holders stand as testaments to craftsmanship and elegance. This article delves into the art of creating high-end wooden pencil holders, guiding you through the process of transforming simple materials into statement pieces for discerning individuals.

Selecting the Right Wood: A Foundation of Excellence

The foundation of any high-end wooden pencil holder lies in the choice of wood. Selecting the right species is crucial, as it dictates the aesthetic appeal, durability, and overall character of the finished product.

Exotic and Domestic Woods: A Spectrum of Beauty

Exotic woods, known for their vibrant colors, intricate grain patterns, and inherent durability, often take center stage in luxury design. Examples include:

  • Ebony: Deep black with a smooth, lustrous finish, conveying an air of sophistication.
  • Macassar Ebony: A rich, dark brown with pronounced grain patterns, adding depth and visual interest.
  • Rosewood: Known for its reddish-brown hues and intricate swirls, exuding warmth and elegance.

Domestic woods, while perhaps less exotic, offer their own unique charm and appeal. These include:

  • Walnut: Rich, dark brown with a distinctive grain pattern, lending a classic and refined touch.
  • Cherry: Warm, reddish-brown tones with an elegant grain, exuding a timeless elegance.
  • Maple: Known for its pale, creamy color and tight grain, offering a clean and contemporary aesthetic.

Understanding Wood Characteristics: A Guide to Choice

Beyond aesthetics, consider the wood's characteristics:

  • Hardness: Hardwoods are generally more durable and resistant to scratches and dents, suitable for high-use areas.
  • Grain Pattern: The arrangement of wood fibers creates distinct visual effects, from subtle to dramatic. Choose a pattern that complements the overall design aesthetic.
  • Finish: Different wood species accept finishes differently, influencing the final look and feel of the holder.

Mastering the Craft: Shaping the Pencil Holder

Once the wood is selected, the crafting process begins. This involves precise shaping, meticulous sanding, and careful assembly to create a functional and visually stunning piece.

Design and Form: A Symphony of Functionality and Aesthetics

The design of the pencil holder should be both practical and aesthetically pleasing. Consider these aspects:

  • Shape: Rectangular, cylindrical, or even whimsical forms can be explored, each offering a unique aesthetic.
  • Size: The holder's dimensions should be proportional to its intended use and the overall design of the space.
  • Capacity: Determine the number of pencils to be accommodated, ensuring ample space without overcrowding.

Tools of the Trade: Precision and Skill

Crafting a high-end pencil holder requires the right tools and techniques. Essential tools include:

  • Table Saw: Precisely cuts wood to the desired dimensions.
  • Band Saw: Shapes curves and intricate designs.
  • Hand Plane: Smooths and refines surfaces for a polished finish.
  • Sandpaper: Creates a smooth, consistent surface for finishing.

Enhancing the Finish: Elevating the Aesthetic

The final finish is the culmination of the crafting process, transforming the wood into a visually striking and enduring piece. A variety of techniques can be employed to achieve a high-end look.

The Art of Finishing: Techniques for Elegance

Consider these finishing techniques:

  • Polishing: Polishing with fine-grit sandpaper and wax creates a smooth, glossy surface, enhancing the natural beauty of the wood.
  • Oil Finishing: Oil finishes, such as tung oil or linseed oil, penetrate the wood, enhancing its color and providing a durable, water-resistant finish.
  • Lacquer: Lacquers offer a hard, glossy finish that protects the wood from scratches and stains while adding a layer of elegance.
  • Dyeing: Wood dyes can be used to enhance the natural color or create custom shades, allowing for a personalized touch.

Metal Accents: A Touch of Sophistication

To further elevate the pencil holder, consider incorporating metal accents. These can include:

  • Brass: A classic choice, brass adds a warm and luxurious touch.
  • Silver: Provides a sleek and modern aesthetic.
  • Copper: Introduces a touch of warmth and patina.

Metal accents can be used for details such as:

  • Pencil Rest: A simple, metal strip at the top of the holder adds a touch of refinement and prevents pencils from rolling.
  • Base: A metal base can elevate the holder, adding a sense of gravitas and stability.
  • Embellishments: Ornate metal inlays, engraved details, or simple metal accents can enhance the visual appeal.

Beyond Functionality: A Statement Piece for Luxury Spaces

A high-end wooden pencil holder is more than just a functional object; it's a statement piece that reflects the owner's taste and appreciation for craftsmanship. The meticulous attention to detail, the choice of premium materials, and the artistry of the finish elevate it beyond the ordinary.

Placement and Integration: Enhancing the Ambience

Place the pencil holder in a prominent location where its beauty can be admired, such as:

  • On a desk in a home office: It becomes a focal point, reflecting the owner's refined taste.
  • In a study or library: Its presence adds a touch of elegance and sophistication to the space.
  • As a decorative element in a living room: It can be displayed on a bookshelf or coffee table, adding a touch of warmth and personality.

Gifting with Elegance: A Thoughtful Present

A handcrafted wooden pencil holder makes a thoughtful and impressive gift for individuals who appreciate quality and artistry. It can be personalized with engraved initials, a special message, or a custom finish to make it truly unique. Consider gifting it for:

  • A birthday or anniversary: A gift that's both practical and stylish.
  • A housewarming: A welcome addition to a newly decorated space.
  • A graduation or promotion: A symbol of achievement and success.

In conclusion, crafting high-end wooden pencil holders is a testament to craftsmanship and artistry. By selecting the right wood, mastering the shaping process, and applying a meticulous finish, you can create a statement piece that elevates any space. These unique creations are not just functional objects but expressions of elegance, sophistication, and the enduring beauty of natural materials.

Share:

How to Build Custom Wooden Key Racks for Extra Income

How to Build Custom Wooden Key Racks for Extra Income

How to Build Custom Wooden Key Racks for Extra Income

Hey there, crafty folks! Ever wished you could turn your love for woodworking into a little extra cash? Well, I've got good news for you: building custom wooden key racks is a fantastic way to do just that! Not only is it a fun and rewarding project, but it also has a pretty high demand â€" after all, everyone needs a place to hang their keys.

The Allure of Custom Key Racks

The beauty of custom key racks lies in their versatility. They can be tailored to individual preferences and home decor. You can get creative with designs, finishes, and even add functional extras like hooks for hats, leashes, or mail. This personalization is what really sets them apart and makes them a hot commodity.

Getting Started: Tools and Materials

Don't worry, you don't need to be a seasoned woodworker to start. The basic tools and materials are fairly accessible. Here's what you'll need:

Essential Tools:

  • Saw (Circular, jigsaw, or handsaw)
  • Drill
  • Sandpaper (various grits)
  • Measuring tape
  • Level
  • Clamps
  • Safety gear (goggles, gloves, ear protection)

Materials:

  • Wood (Pine, oak, or maple are great choices for beginners)
  • Hooks (metal, ceramic, or wooden)
  • Wood glue
  • Wood stain or paint
  • Finish (polyurethane, varnish, or wax)

Designing Your Key Rack

The fun begins with design! Think about what you want your key rack to look like. Consider:

  • Shape: Rectangular, square, round, or even a whimsical silhouette?
  • Size: How many keys will it hold? What's the best fit for the space?
  • Style: Modern, rustic, farmhouse, or something else?
  • Functionality: Will you add extra hooks or compartments?

Once you have a general idea, sketch it out on paper. Don't be afraid to experiment and play with different elements. You can also find inspiration online â€" Pinterest and Instagram are treasure troves of key rack ideas!

Building Your Key Rack

Now comes the hands-on part. Here's a basic step-by-step guide:

  1. Cut the wood: Using your saw, cut the wood pieces to the dimensions you planned. Make sure the cuts are precise and straight.
  2. Sand the wood: Start with rough sandpaper and work your way down to a finer grit to create a smooth surface.
  3. Assemble the key rack: Join the wood pieces using wood glue. Use clamps to hold them together until the glue dries completely.
  4. Attach the hooks: Drill pilot holes for the hooks and then screw them in. Make sure the hooks are evenly spaced and at a comfortable height.
  5. Stain or paint the key rack: Apply stain or paint to your liking. Follow the manufacturer's instructions for drying time.
  6. Apply a finish: Choose a finish that best suits your style and the wood. Apply it evenly using a brush or cloth.

Marketing and Selling Your Creations

With your key rack ready, it's time to get the word out and start making some money! Here are some effective marketing strategies:

  • Craft fairs and markets: These events offer direct exposure to potential customers and allow you to showcase your unique designs.
  • Online platforms: Etsy, Amazon Handmade, and Facebook Marketplace are excellent places to reach a wider audience.
  • Social media: Use Instagram and Pinterest to showcase your work and connect with potential buyers.
  • Local shops and boutiques: Partner with shops that sell home decor or gifts to expand your reach.

Don't forget to price your key racks competitively, factoring in your time, materials, and overhead costs. Offer a range of options to cater to different budgets and styles. Remember, quality craftsmanship and unique designs are key to attracting customers and building a loyal following.

Tips for Success

Here are some extra tips to help you make your key rack venture a success:

  • Invest in good tools: A quality saw, drill, and sander will make your work easier and produce better results.
  • Practice and learn: Don't be afraid to experiment and try new techniques. There are tons of online resources and tutorials to help you improve your skills.
  • Offer excellent customer service: Respond promptly to inquiries, package orders carefully, and follow up to ensure customer satisfaction.
  • Be patient: Building a successful business takes time and effort. Stay focused on your goals and don't give up! It might take a while to start seeing regular sales, but with perseverance, you can achieve your goals.

Commonly Asked Questions

Here are some common questions people have about making custom key racks:

Q: How much can I make selling wooden key racks?

A: It's hard to give a definite figure, as it depends on factors like design, materials, sales volume, and marketing strategies. But with good craftsmanship, unique designs, and effective marketing, you can expect to earn a decent amount of extra income.

Q: How do I find my niche in the market?

A: Look at what's already popular and consider what makes your designs unique. Do you specialize in rustic, modern, or farmhouse styles? Are you adding special features like extra hooks, compartments, or personalized engravings? Identifying your strengths and finding a niche can help you stand out from the competition.

Q: What's the best way to price my key racks?

A: Consider your costs, including materials, time, and overhead. Factor in your desired profit margin. Do some research on competitor pricing to get a sense of the market rate. You can start with a slightly higher price point and adjust as needed based on customer feedback.

Q: What if I don't have a lot of woodworking experience?

A: That's okay! Start with simple designs and gradually increase complexity as you gain confidence. There are plenty of beginner-friendly tutorials and workshops available online and in your local area. Don't be afraid to ask for help or advice from experienced woodworkers.

So there you have it! Building custom wooden key racks can be a fun and rewarding way to earn extra income. With some creativity, dedication, and a little bit of elbow grease, you can turn your passion for woodworking into a successful side hustle.

Share:

How to Build Wall Shelves That Double as Art and Storage

How to Build Wall Shelves That Double as Art and Storage

Elevate Your Interior Design: Building Wall Shelves That Double as Art and Storage

In the realm of interior design, the pursuit of functionality and aesthetics often intertwines. Wall shelves, traditionally conceived as storage solutions, have transcended their utilitarian purpose to become integral elements of visual appeal. This article delves into the art of crafting wall shelves that seamlessly blend storage and artistic expression, enhancing the ambiance of any space.

Embracing the Dual Role of Wall Shelves

Wall shelves offer a unique opportunity to marry practicality and visual interest. By thoughtfully designing and incorporating these structures, you can achieve a harmonious balance between functionality and aesthetics. The key lies in recognizing that wall shelves can serve as both platforms for showcasing treasured possessions and decorative elements in their own right.

Storage Solutions Enhanced by Aesthetics

Traditional storage solutions, such as cabinets and drawers, can often dominate a room's visual landscape. Wall shelves, in contrast, provide a more subtle and integrated approach. They can be tailored to accommodate specific items, from books and framed photographs to plants and decorative accents. By strategically placing shelves and selecting appropriate materials, you can create a sense of order and organization without sacrificing visual harmony.

Artful Displays Through Functional Structures

Wall shelves themselves can become artistic features. Their design, materials, and installation can contribute significantly to the overall aesthetic of a room. By incorporating unique shapes, finishes, and arrangements, you can elevate the shelves beyond mere storage units into works of art. This can range from using reclaimed wood for a rustic charm to employing sleek metal for a contemporary feel.

The Art of Planning and Design

Building wall shelves that double as art and storage requires a meticulous approach to planning and design. Careful consideration of factors such as space, function, and aesthetics will ensure a cohesive and visually pleasing outcome.

Assessing Space and Functionality

The first step involves analyzing the available space and identifying the intended function of the shelves. Consider the following:

  • What items will be stored on the shelves?
  • What is the desired visual impact?
  • How much weight will the shelves need to support?
  • Are there any structural limitations to consider?

Choosing Materials and Finishes

The choice of materials and finishes will play a crucial role in determining the overall style and aesthetic of the shelves. A wide range of options is available, each contributing a unique character:

  • Wood: Offers warmth and versatility, available in various species and finishes.
  • Metal: Provides a sleek and modern aesthetic, suitable for industrial or minimalist styles.
  • Glass: Creates a sense of lightness and openness, ideal for showcasing delicate items.
  • Acrylic: Offers transparency and durability, suitable for contemporary settings.

Defining the Design and Layout

The design and layout of the shelves should be tailored to the specific requirements of the space and intended use. Consider:

  • Shape: Straight, curved, or angled shelves can create visual interest.
  • Dimensions: Determine the optimal depth and width to accommodate the stored items.
  • Arrangement: Experiment with different shelf configurations and levels to create a balanced aesthetic.

Building the Shelves: A Step-by-Step Guide

The construction process for wall shelves can vary depending on the chosen materials and design. However, a general framework can provide guidance:

  • Measure and Cut: Accurately measure the space and cut the materials to the desired dimensions.
  • Assemble the Shelf Unit: Join the shelf boards and supports using appropriate fasteners, ensuring stability and strength.
  • Mount the Brackets: Attach the shelf brackets to the wall using appropriate anchors and screws, ensuring they are securely fastened.
  • Install the Shelves: Carefully place the assembled shelves onto the mounted brackets, ensuring a snug fit.

Enhancing Aesthetics: Styling and Display

Once the shelves are constructed and installed, the real artistry begins: styling and displaying your treasured possessions. This process involves selecting and arranging items to create a visually engaging and harmonious composition.

Choosing Display Items

The items displayed on the shelves should reflect your personal style and interests. Consider incorporating a mix of:

  • Artwork: Framed prints, photographs, paintings, or tapestries.
  • Collectibles: Antique objects, figurines, or souvenirs.
  • Books: Stacked or arranged in a visually appealing manner.
  • Plants: Greenery can add life and vibrancy to the shelves.
  • Decorative Accents: Vases, candles, or sculptures.

Creating Visual Harmony

To create a visually pleasing display, consider the following principles:

  • Balance: Distribute the weight and size of items evenly across the shelves.
  • Contrast: Use a mix of colors, textures, and shapes to add visual interest.
  • Unity: Ensure that the overall display has a cohesive theme or style.
  • Negative Space: Leave some empty space between items to prevent overcrowding.

Conclusion: Transforming Storage into Art

By building wall shelves that double as art and storage, you can elevate the functionality and aesthetics of any space. The process involves meticulous planning, thoughtful design, and a creative approach to styling and display. Through this fusion of practicality and artistic expression, your shelves can become captivating focal points that enhance the ambiance and personal touch of your home.

Share:

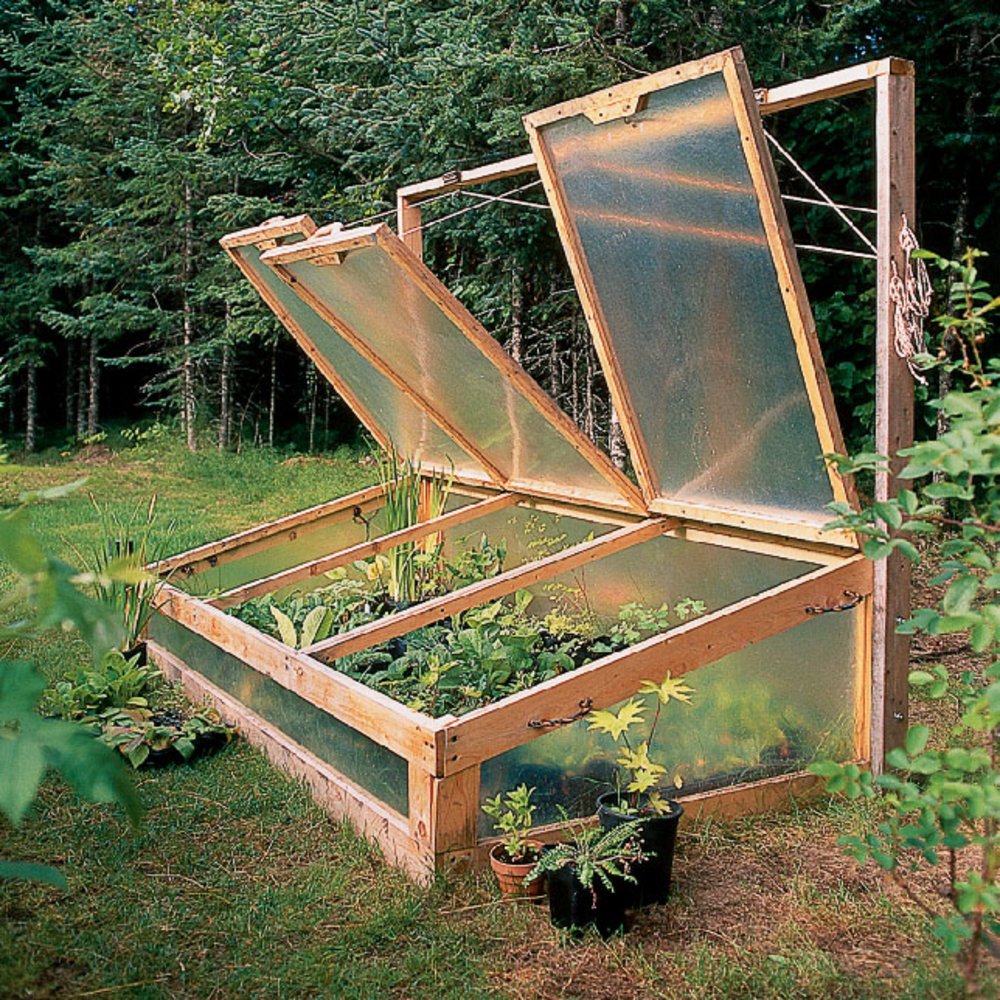
Wood Cold Frame Plans: Classic and Durable

Wood Cold Frame Plans: Classic and Durable

Wood Cold Frame Plans: Classic and Durable

Hey there, fellow gardening enthusiast! Ready to extend your growing season and give your precious plants a head start? A cold frame is your ticket to success, and building one yourself with wood is a super rewarding project. Let's dive into the world of wood cold frames, where durability and classic style meet.

Why Build a Wood Cold Frame?

Think of a cold frame as a mini greenhouse, a cozy haven for your plants to thrive. It traps heat from the sun, creating a warm and sheltered environment, even in chilly weather. Wood is the classic choice for cold frame construction because it's:

  • Durable: A well-built wood cold frame can last for years, weathering the elements.
  • Insulating: Wood helps retain heat, keeping your plants warm and cozy.
  • Versatile: You can customize the size and shape to fit your garden perfectly.
  • Affordable: You can often find the materials for a wood cold frame at local lumberyards or even reuse salvaged wood.

Choosing the Right Wood

The type of wood you choose is super important for longevity. Here are some popular options:

  • Cedar: Known for its natural resistance to rot and insects, cedar is a premium choice but also pricier.
  • Redwood: Similar to cedar, redwood is naturally resistant to decay and has a beautiful reddish hue.
  • Pressure-Treated Pine: A budget-friendly option that's been treated to resist rot and insects. However, it's a good idea to use a non-toxic sealant for the inside of the frame to protect your plants.

If you're reusing old wood, make sure it's clean, dry, and free of any rot or pests.

Essential Tools and Materials

Before you start, gather these tools and materials. It's always a good idea to check your local building codes and permits as well.

Tools

  • Saw (circular saw or miter saw)
  • Drill
  • Screwdriver (power drill is a bonus!)
  • Tape measure
  • Level
  • Pencil or marker
  • Clamps

Materials

  • Wood (boards for the frame, and plywood or polycarbonate for the glazing)
  • Screws or nails
  • Hinges
  • Hardware for the lid (latches, handles)
  • Silicone sealant (for sealing the glazing)
  • Optional: Paint or stain for the exterior (be sure it's non-toxic if you plan to use it on the inside)

Cold Frame Design: Choosing the Right Size and Shape

The size of your cold frame depends on the space you have and the plants you plan to grow. A smaller cold frame might be perfect for starting seedlings, while a larger one can shelter larger plants. Here are some common cold frame shapes:

  • Rectangular: The most common shape, easy to build and provides plenty of space.
  • Lean-to: This design leans against a wall or fence, saving space and providing extra support.
  • A-Frame: A classic and attractive shape with a sloping roof.

Consider how you'll access your plants. A hinged lid is a great way to make tending to your plants easy and comfortable.

Building Your Wood Cold Frame: Step-by-Step Instructions

Okay, let's get our hands dirty! Here's a basic guide for building a rectangular cold frame. Always consult the plans and make adjustments to fit your specific design.

1. Cut the Frame Pieces

  • Measure and cut the four side pieces to the desired height of your cold frame.
  • Measure and cut the two bottom pieces to the desired length.
  • Cut the two top pieces to be slightly longer than the bottom pieces to create an overhang for the lid.

2. Assemble the Frame

  • Place the two bottom pieces parallel to each other on a flat surface.
  • Attach the side pieces to the bottom pieces using screws or nails.
  • Place the top pieces on top of the side pieces, flush with the top edges.
  • Attach the top pieces to the side pieces, securing the frame.

3. Build the Lid

  • Cut the lid frame pieces similar to the base frame, but with slightly shorter dimensions to fit inside the frame.
  • Assemble the lid frame as you did the base frame.
  • Attach hinges to the lid frame, ensuring they are positioned so the lid can open and close smoothly.

4. Install the Glazing

  • You can choose between **polycarbonate panels** for durability and **glass** for a more traditional look.
  • If using polycarbonate, cut it to fit the base and lid frames, leaving a slight overhang for a better seal.
  • If using glass, ensure the glass is strong enough to withstand weather conditions and cut it to size with a glass cutter.
  • Apply silicone sealant around the edges of the glazing, attaching it securely to the frames.

5. Add Hardware

  • Install latches or other hardware on the lid to secure it when closed.
  • Consider adding a handle to the lid for easy opening and closing.

6. Finishing Touches

  • Paint or stain the exterior of the cold frame for a more polished look. Be sure to use non-toxic paint or stain if you plan to use the cold frame inside the frame.
  • Add a layer of mulch or compost to the bottom of the cold frame to help retain moisture.

Tips for Success

Ready to start growing? Here are a few tips for using your cold frame:

  • Choose the right location: Place your cold frame in a sunny spot, preferably facing south.
  • Protect from extreme temperatures: On very cold days, cover the lid with a blanket or tarp for extra insulation. On hot days, open the lid for ventilation.
  • Monitor moisture levels: The enclosed environment can get humid, so check the soil regularly and water as needed.
  • Don't overcrowd your plants: Give your plants plenty of space to grow and thrive. Don't be afraid to thin out seedlings.
  • Enjoy the benefits!: Get ready to witness the magic of your cold frame, from sturdy seedlings to bountiful harvests.

Building a wood cold frame is a rewarding experience that will enhance your gardening journey! Get creative, enjoy the process, and you'll be amazed by the incredible results. Happy gardening!

Share:

Practical DIY Bedside Cabinet Ideas with PDF Plans for Download

Practical DIY Bedside Cabinet Ideas with PDF Plans for Download

Practical DIY Bedside Cabinet Ideas with PDF Plans for Download

Tired of your bedside table looking bland and boring? Do you wish you had a little extra storage space in your bedroom? You're not alone! Many people dream of having the perfect bedside cabinet, one that fits their style and needs perfectly. The good news is, you don't have to spend a fortune on a fancy store-bought solution. With some basic tools, materials, and a bit of creativity, you can build your own unique bedside cabinet, saving money and adding a personal touch to your bedroom.

This article will guide you through crafting your own bedside cabinet, offering practical DIY ideas with free downloadable PDF plans. We'll cover a variety of styles and designs, from simple and rustic to modern and sleek. Get ready to unleash your inner carpenter and create a bedside cabinet that you'll be proud to display!

DIY Bedside Cabinet Ideas to Inspire Your Creativity

Before diving into the plans, let's explore some exciting DIY bedside cabinet ideas that can ignite your creativity.

Rustic Charm with Reclaimed Wood

Give your bedroom a touch of rustic charm with a bedside cabinet made from reclaimed wood. The unique textures and knots in the wood add a natural, weathered look. Consider using salvaged pallets, old barn wood, or even repurposed furniture pieces for an authentic feel. Paint it in earthy tones or leave it natural for a truly rustic vibe.

Sleek Minimalist Style

If you're a fan of modern design, a minimalist bedside cabinet is the perfect choice. Opt for clean lines, simple shapes, and a neutral color palette. You can build it from plywood, MDF, or even metal for a truly contemporary look. Don't forget to add some functional elements like a built-in drawer or open shelving for storage.

Creative Storage Solutions

Think outside the box and get creative with storage solutions. A bedside cabinet with a built-in magazine rack, a hidden compartment for your phone charger, or even a secret drawer for your valuables can be both practical and stylish.

Personalized Touches

Make your bedside cabinet truly unique by adding personal touches. Consider incorporating your favorite color, a patterned fabric for the drawer front, or even a custom-made handle. The possibilities are endless!

Free PDF Plans for Download

Now that you're brimming with inspiration, let's get down to the nitty-gritty. We've curated a collection of free PDF plans for you to download and use for your DIY bedside cabinet projects. These plans come with detailed instructions, cutting diagrams, and materials lists, making the construction process smooth and enjoyable. Here are a few options to get you started:

Simple Bedside Cabinet Plan

This plan is perfect for beginners or those who prefer a straightforward design. It features a basic rectangular cabinet with a single drawer. The instructions are easy to follow, and the design can be easily customized to fit your specific needs.

  • Download Link: [link to PDF plan]
  • Modern Bedside Cabinet Plan

    If you're looking for a contemporary and stylish bedside cabinet, this plan is for you. It boasts a sleek, minimalist design with open shelving and a hidden drawer. The instructions are detailed and include tips for creating a seamless finish.

  • Download Link: [link to PDF plan]
  • Rustic Bedside Cabinet Plan

    This plan is perfect for those who appreciate the beauty of natural wood. It features a sturdy cabinet with a distressed finish that adds a touch of rustic charm. The instructions provide guidance on creating a unique and weathered look.

  • Download Link: [link to PDF plan]
  • Essential Tools and Materials

    Before you begin, gather the necessary tools and materials. Here's a basic list for most DIY bedside cabinet projects:

    • Wood (plywood, MDF, reclaimed wood)
    • Screws
    • Nails
    • Wood glue
    • Saw (circular, jigsaw, or handsaw)
    • Drill
    • Screwdriver
    • Clamps
    • Measuring tape
    • Level
    • Sandpaper
    • Paint or stain (optional)
    • Hardware (hinges, handles, drawer slides)

    Step-by-Step Guide to Building Your Bedside Cabinet

    Now that you have your plans and materials ready, let's dive into the construction process. Follow these general steps, adjusting them based on your specific plan:

    • Cut the wood pieces: Using your saw and measuring tape, carefully cut the wood according to the dimensions outlined in your chosen plan.
    • Assemble the frame: Glue and screw together the sides, top, and bottom of the cabinet frame.
    • Build the drawer: Construct the drawer using the same technique as the cabinet frame. Remember to install drawer slides.
    • Attach the drawer to the cabinet: Once the drawer is built, secure it to the cabinet using the drawer slides.
    • Add shelves: If your plan includes shelves, assemble them and attach them to the cabinet frame.
    • Sand and finish: Sand the entire cabinet to create a smooth surface. Apply paint or stain, if desired.
    • Install hardware: Attach hinges, handles, and other hardware to complete your bedside cabinet.

    Safety Precautions and Tips

    Safety is paramount when working with power tools and wood. Here are some essential safety precautions:

    • Always wear safety glasses and hearing protection when using power tools.
    • Keep your work area clean and clutter-free.
    • Use clamps to secure your wood while cutting and assembling.
    • Don't rush the process. Take your time and ensure every piece is properly secured.
    • Follow the instructions in your chosen plan carefully.

    With a little patience, effort, and creativity, you can build a beautiful and functional bedside cabinet that perfectly complements your bedroom décor. So, grab your tools and get started!

    Share:

    How to Build a Cold Frame for Extended Growth

    How to Build a Cold Frame for Extended Growth

    Building a Cold Frame for Extended Growth: A Step-by-Step Guide

    Hey there, fellow gardening enthusiast! Are you tired of seeing your precious seedlings wither in the cold, harsh weather? Well, fear not! Building a cold frame is like giving your plants a cozy greenhouse haven, extending their growing season and giving you a head start on spring. Let’s dive in and build your very own cold frame!

    Why You Need a Cold Frame

    Think of a cold frame like a mini-greenhouse, providing a warm and protected environment for your plants. Here’s the lowdown on why you should get one:

    • Extend Your Growing Season: Cold frames act as a buffer against the cold, allowing you to start seeds earlier in spring and keep plants growing later into fall.
    • Protect Plants from Frost: Those chilly nights won't be a problem with a cold frame. It traps warmth from the sun, shielding your seedlings from frost damage.
    • Harden Off Seedlings: Gradually acclimating your seedlings to the outdoors is essential, and a cold frame is the perfect place to do it.
    • Provide a Safe Haven: A cold frame acts as a barrier against hungry pests and critters, keeping your plants safe and sound.

    Types of Cold Frames

    There are a few different ways to go about building a cold frame, depending on your budget, materials, and desired size.

    DIY Cold Frames:

    If you're looking for a fun project and love the satisfaction of creating something from scratch, these are your best bets.

    • Wooden Cold Frame: A classic choice, these cold frames offer durability and can be customized to your needs.
    • Brick Cold Frame: For a more permanent and rustic look, consider building with bricks.
    • Recycled Materials Cold Frame: Get creative with recycled materials like windows, pallets, or even old barrels! It's a great way to repurpose items and save money.

    Pre-Made Cold Frames:

    If DIY isn’t your thing, pre-made cold frames are a great option. You can find them in a variety of sizes and materials, ready to be assembled and placed in your garden.

    Choosing the Right Location

    The location you choose for your cold frame will significantly impact its effectiveness. Here are some important factors to consider:

    • Sunlight: A south-facing location is ideal for maximum sunlight exposure. This ensures your plants get the warmth they need for growth.
    • Drainage: Make sure your cold frame is situated on well-drained soil to prevent waterlogging and root rot.
    • Accessibility: Choose a spot that is easy to reach and allows for convenient access for watering, tending, and harvesting.

    Building a Wooden Cold Frame: A Step-by-Step Guide

    Let's build a simple, yet effective wooden cold frame. You’ll need the following materials:

    • Wood: Use pressure-treated lumber for durability, especially if you plan to keep the cold frame outdoors year-round. You'll need 2x4s for the frame, 1x12s for the top and bottom, and optional trim for a finished look.
    • Screws: Use exterior-grade screws for long-lasting strength.
    • Hinges: These will allow you to open the lid for ventilation and access.
    • Glass or Polycarbonate Sheet: This will act as the cover for your cold frame. Glass is classic, while polycarbonate is lighter and more shatter-resistant.
    • Silicone Sealant: This will help create a watertight seal between the frame and the cover.
    • Paint or Stain (Optional): Protect your wood from the elements with a coat of paint or stain.

    Step 1: Building the Frame

    Using the 2x4s, construct a rectangular frame. You can adjust the dimensions to your liking. Remember to leave some overhang for the lid.

    Step 2: Attaching the Top and Bottom

    Attach the 1x12s to the frame using screws. One will form the bottom of your cold frame, and the other will be the lid.

    Step 3: Adding Hinges and Handles

    Attach the hinges to the back of the lid and the frame, making sure they are strong enough to support the weight of the cover. Add a handle to the lid for easy opening and closing.

    Step 4: Installing the Cover

    If you're using glass, cut it to size and secure it to the lid using silicone sealant. If using polycarbonate, make sure it's cut to the correct dimensions and attach it using the appropriate fasteners.

    Step 5: Finishing Touches

    Apply paint or stain to protect the wood, and add any decorative elements you wish. Now you have a beautiful, functional cold frame!

    Using Your Cold Frame

    Here are some tips for getting the most out of your cold frame:

    • Ventilation: Proper ventilation is crucial. Open the lid on sunny days to prevent overheating and excessive humidity. On cold nights, close the lid to trap warmth.
    • Watering: Keep the soil moist but not soggy. Water thoroughly when needed, avoiding overwatering.
    • Soil: Use a well-draining potting mix suitable for your plants. Consider adding compost or other amendments for extra nutrients.
    • Monitoring: Regularly check the temperature inside your cold frame. Make sure it’s not getting too hot or too cold for your plants.
    • Hardening Off: Once your seedlings are strong enough, gradually acclimate them to outdoor conditions by opening the lid for longer periods each day.

    That’s it! You’ve now got a cold frame to protect your precious plants, extend your growing season, and enjoy fresh, homegrown produce for longer.

    Happy gardening!

    Share:

    How to design a grill gazebo with a water fountain feature

    How to design a grill gazebo with a water fountain feature

    Transform Your Backyard Oasis: Building a Grill Gazebo with a Water Fountain Feature

    Imagine this: you're grilling up a feast for friends and family, the tantalizing aromas wafting through the air, while the gentle sound of cascading water creates a serene backdrop. This is the magic of a grill gazebo with a water fountain, a unique combination of functionality and aesthetics that can elevate your backyard entertainment to a whole new level.

    Building a grill gazebo with a water fountain is a project that requires a bit of planning and effort, but the rewards are immense. It's a project that can be tailored to your specific needs and preferences, allowing you to create a truly personalized outdoor sanctuary.

    Planning Your Grill Gazebo with a Water Fountain

    Before diving into the construction, it's crucial to have a solid plan in place. This includes determining the size, shape, and style of the gazebo, the type of grill you want to incorporate, and the design of the water fountain. Here's a breakdown of the key considerations:

    Size and Shape

    The size of your gazebo should be determined by how much space you have available and the number of people you typically entertain. A standard gazebo size is around 10x12 feet, which provides ample room for grilling, dining, and lounging. If you have more space, you could go for a larger gazebo.

    The shape is another design choice that can significantly impact the overall look. Square or rectangular gazebos offer a more traditional look, while octagonal or circular gazebos can add a touch of whimsy and spaciousness.

    Grill Type

    Consider your grilling needs and style when choosing the type of grill. A gas grill offers convenience and quick heating, while a charcoal grill provides that smoky flavor. If you enjoy cooking a variety of dishes, a combination grill with both gas and charcoal options might be the best choice.

    Don't forget to factor in the size of the grill and its weight when determining the gazebo's structure. You'll want to ensure the gazebo can support the weight and provide ample clearance for the grill.

    Water Fountain Design

    The possibilities are endless when it comes to water fountain designs. You can go for a simple freestanding fountain, an elegant wall-mounted fountain, or a more elaborate cascading fountain with multiple tiers. Consider the overall style of your gazebo and choose a fountain that complements it.

    Also, think about the water source. Do you want to connect to your home's water supply or use a self-contained system? If you choose a self-contained system, you'll need to consider the size of the reservoir and how often you need to refill it.

    Choosing Materials for Your Gazebo

    The materials you choose for your gazebo will dictate its style, durability, and maintenance requirements. Here are some popular options:

    • Wood: This classic material offers warmth and charm. It's relatively easy to work with and can be customized to your liking. However, wood requires regular maintenance to prevent rot and insect infestation.
    • Aluminum: Durable and low-maintenance, aluminum is a good choice for those who want a long-lasting gazebo. It's also lightweight and easy to assemble.
    • Vinyl: Vinyl offers a more budget-friendly option compared to wood or aluminum. It's also very low-maintenance, resistant to moisture and fading.
    • Steel: Steel provides exceptional strength and durability. However, it can be more expensive than other materials and may require painting for rust prevention.

    Incorporating a Water Fountain

    Now, let's dive into the exciting part: incorporating the water fountain. Here's a step-by-step guide:

    Location and Placement

    Choose a spot for the fountain within the gazebo where it will be visually appealing and easily accessible. Consider the placement of the water supply and the drainage system. If you're using a self-contained fountain, ensure there's adequate space for the reservoir.

    Foundation and Support

    If you are building a large or elaborate fountain, you may need to create a solid foundation to support its weight. Consult a professional contractor for expert advice on creating a suitable foundation based on the fountain's size and design.

    Water Source and Drainage

    Connect the fountain to a reliable water source, either your home's water supply or a self-contained reservoir. Ensure that the water source is properly insulated to prevent freezing in colder climates. Set up a drainage system to collect and direct the water away from the gazebo.

    Electrical Connections

    If your fountain uses a pump or lighting, you'll need to run electrical wiring to the fountain. Make sure to follow all electrical safety guidelines and consult a qualified electrician for any complex wiring installations.

    Adding Finishing Touches

    Once the basic structure and fountain are in place, it's time to add those personal touches to make your grill gazebo truly unique. Consider these ideas:

    • Lighting: Add ambient lighting with string lights, lanterns, or solar-powered lights to create a warm and inviting atmosphere.
    • Greenery: Plant climbing vines or flowering shrubs around the gazebo for a touch of natural beauty. Consider using plants that attract pollinators to create a bee-friendly space.
    • Seating and Tables: Choose comfortable and stylish seating options for guests. Consider using a combination of chairs, benches, and a dining table to accommodate different seating preferences.
    • Outdoor Rug: Add an outdoor rug to define the space and add warmth to the area. Choose a rug that complements the color scheme and style of your gazebo.

    Maintenance Tips for Your Grill Gazebo with a Water Fountain

    To keep your grill gazebo and fountain looking their best, follow these maintenance tips:

    • Regular Cleaning: Clean the gazebo regularly to remove dirt, debris, and spills. Use a mild soap and water solution for cleaning, and avoid harsh chemicals that can damage the materials.
    • Water Fountain Maintenance: Clean the fountain regularly to prevent mineral buildup and algae growth. Change the water frequently and clean the pump and other components as needed. Check the water levels and make sure the pump is functioning properly.
    • Inspect the Structure: Periodically inspect the structure for signs of wear and tear, such as loose bolts, cracks, or rust. Address any issues promptly to prevent further damage.
    • Winterization: In colder climates, it's essential to winterize the fountain to prevent freezing damage. This may involve draining the water, disconnecting the pump, and covering the fountain.

    Building a grill gazebo with a water fountain is a rewarding project that can transform your backyard into an oasis of relaxation and entertainment. With careful planning, the right materials, and a touch of creativity, you can create a space that you'll cherish for years to come.

    Share:

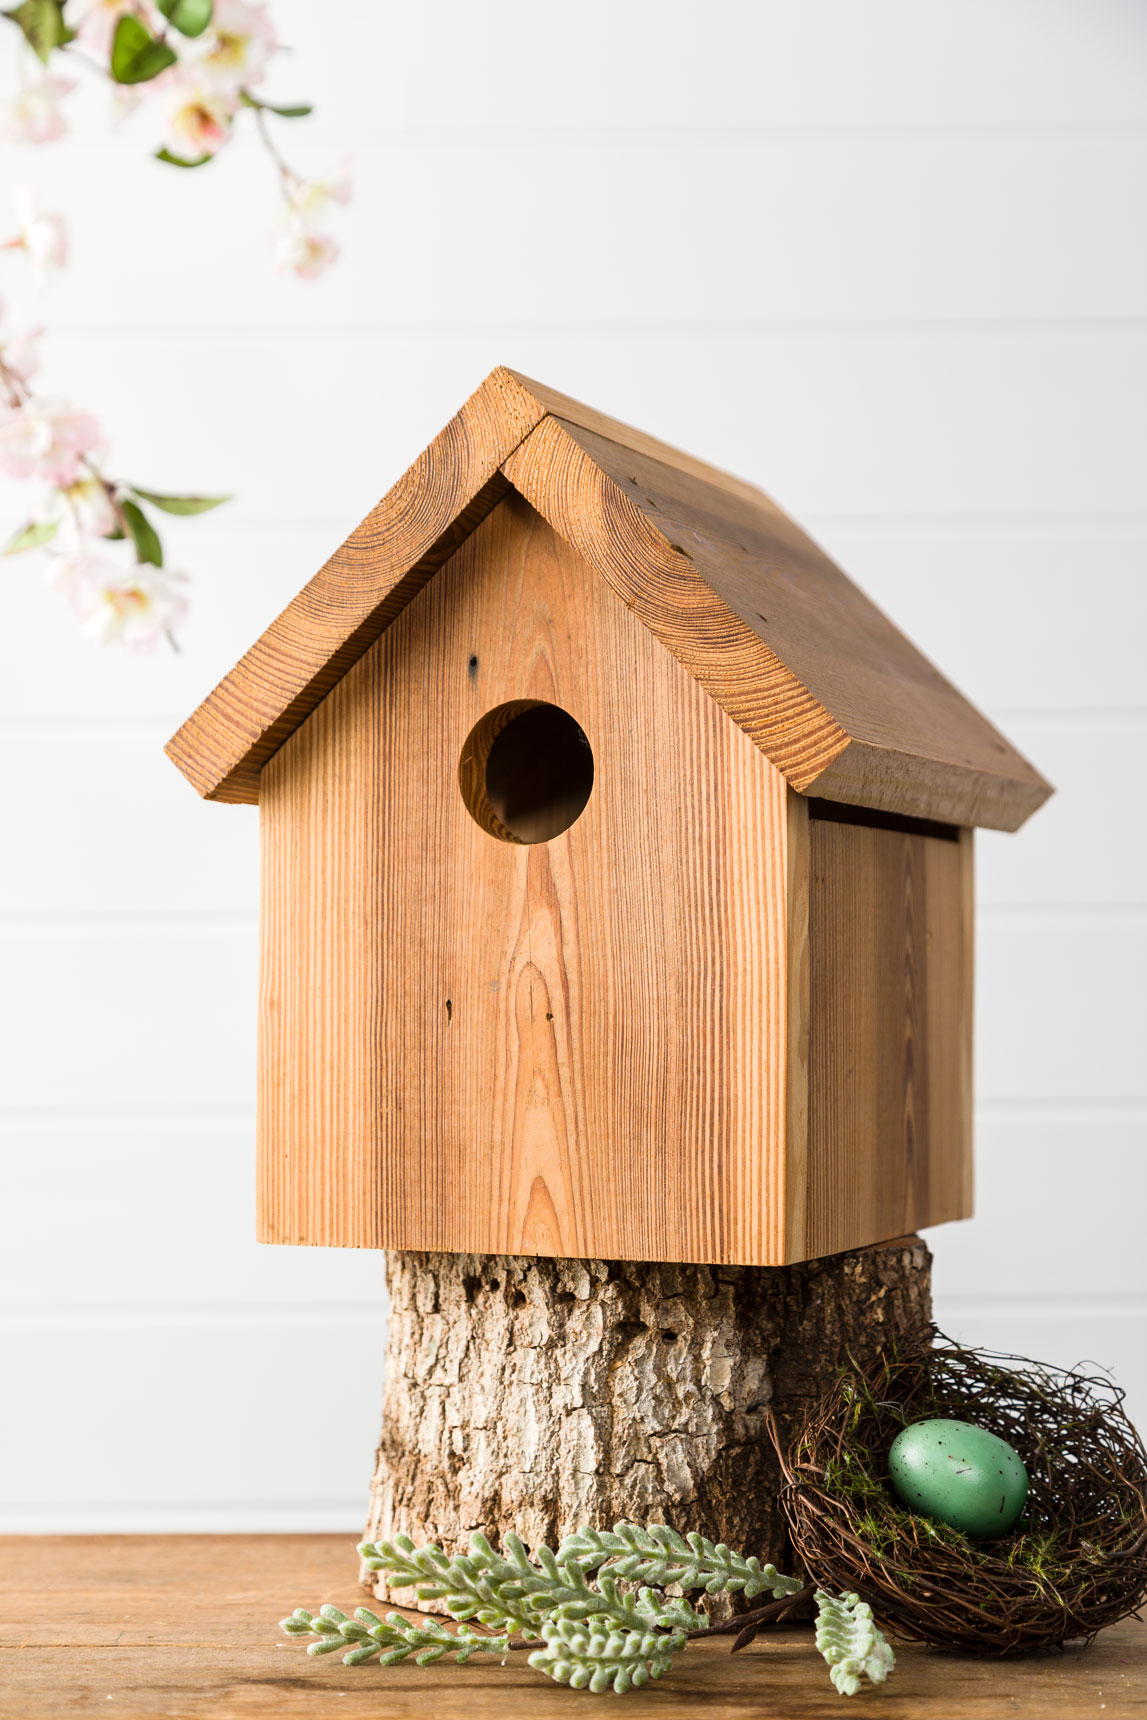
    How to Build a Birdhouse with Easy-to-Clean Features

    How to Build a Birdhouse with Easy-to-Clean Features

    Building a Birdhouse with Easy-to-Clean Features

    Attract feathered friends to your backyard with a cozy birdhouse, but don't forget about the upkeep! A well-designed birdhouse should be easy to clean to keep your winged guests healthy and happy. Here's a guide on how to build a birdhouse with easy-to-clean features, ensuring a safe and hygienic haven for your feathered friends.

    Choosing the Right Materials

    Selecting the right materials is crucial for both durability and easy cleaning. Opt for materials that are resistant to moisture and easy to sanitize. Here are some excellent choices:

    Wood

    Cedar, redwood, and cypress are naturally resistant to rot and insects, making them excellent choices for birdhouses. These woods are also easily cleaned with a damp cloth and mild soap.

    PVC

    PVC is another great option for birdhouses. It's water-resistant, durable, and can be easily wiped clean with a damp cloth. While not as natural as wood, PVC is a practical and long-lasting material.

    Designing for Easy Access

    The key to easy cleaning is ensuring you can readily access the interior of the birdhouse. Consider these design elements:

    Removable Roof

    Make the roof removable by attaching it with hinges or screws. This allows you to easily lift it off for cleaning, without disturbing the nesting material or eggs.

    Removable Floor

    A removable floor panel makes cleaning a breeze. Simply lift it out and dispose of any debris. This is particularly helpful for cleaning up droppings and old nesting material.

    Adding Cleaning-Friendly Features

    Incorporate these features to simplify the cleaning process:

    • Smooth Interior Surfaces: Avoid rough or textured surfaces that can trap debris. Smooth, sanded wood or PVC surfaces are easier to wipe clean.
    • Drainage Holes: Add a few small drainage holes in the floor to allow water to escape and prevent mold growth.
    • Exterior Paint: Use a non-toxic, water-based paint on the exterior for easy cleaning and to prevent the wood from absorbing moisture.

    Cleaning Your Birdhouse

    Regular cleaning is essential for keeping your birdhouse healthy and inviting. Here's a simple cleaning routine:

    • Remove the roof and floor panels
    • Dispose of old nesting material
    • Wipe the interior and exterior surfaces with a damp cloth and mild soap
    • Rinse thoroughly with clean water
    • Allow the birdhouse to dry completely before reassembling

    With a little planning and attention to detail, you can build a birdhouse that's not only welcoming to your feathered friends but also easy to maintain. Enjoy the joy of watching birds raise their young in a clean and healthy environment!

    Share:

    Step-by-Step Birdhouse Building Guide for All Skill Levels

    Step-by-Step Birdhouse Building Guide for All Skill Levels

    Step-by-Step Birdhouse Building Guide for All Skill Levels

    Welcome to the delightful world of birdhouse building! Whether you're a seasoned woodworker or a curious beginner, crafting a welcoming home for feathered friends is a rewarding and enjoyable project. This comprehensive guide will lead you through the process, from choosing the right materials to adding finishing touches. Get ready to build a sanctuary for birds and create a beautiful addition to your garden!

    Choosing the Right Birdhouse

    Before you dive into building, consider the birds you want to attract. Different species prefer different styles and sizes of birdhouses. Research the common birds in your area and select a design that best suits their needs. Look for resources online or at your local library to find detailed information about birdhouse dimensions and features.

    Birdhouse Styles

    There are countless birdhouse designs available, each with its own unique appeal. Popular choices include:

    • Classic Birdhouses: These traditional designs feature a simple box shape with a slanted roof and a small entrance hole.
    • Bluebird Houses: Designed specifically for bluebirds, these houses have a slightly larger entrance hole and a nesting box that allows for easy observation.
    • Squirrel-Proof Birdhouses: These houses incorporate features like metal baffles or a roof overhang to prevent squirrels from accessing the nesting cavity.

    Materials You'll Need

    Gather the necessary materials for your chosen birdhouse design. Depending on your preferences and the level of detail you desire, you might need:

    • Wood: Cedar, redwood, or pine are excellent choices for birdhouses. They are naturally resistant to rot and decay.
    • Screws: Choose screws that are appropriate for the thickness of your wood. Stainless steel screws are ideal for outdoor use.
    • Saw: A hand saw, circular saw, or jigsaw will help you cut the wood to the desired size.
    • Drill: Use a drill with appropriate drill bits for creating the entrance hole and any other necessary holes.
    • Measuring Tape: Accurate measurements are essential for constructing a well-proportioned birdhouse.
    • Sandpaper: Sand the edges of your birdhouse to create a smooth and safe surface for the birds.
    • Paint or Stain: If you want to add a decorative touch, use non-toxic paint or stain to protect your birdhouse and enhance its appearance.

    Beginner's Birdhouse Project: The Classic Design

    This beginner-friendly birdhouse is perfect for those new to woodworking. It features a simple box shape and is easy to assemble.

    Step 1: Cut the Wood

    Cut your wood to the following dimensions:

    • Front and Back Panels: 6 inches x 8 inches
    • Side Panels: 6 inches x 6 inches
    • Roof: 8 inches x 10 inches
    • Floor: 6 inches x 6 inches

    Step 2: Assemble the Walls

    Align the front and back panels with the side panels, ensuring all edges are flush. Use screws to attach the panels together, creating the box shape.

    Step 3: Create the Entrance Hole

    Use a drill to create an entrance hole in the front panel. The size of the hole will vary depending on the type of bird you want to attract. For small birds, a 1.5-inch diameter hole is ideal.

    Step 4: Attach the Floor

    Secure the floor to the bottom of the box.

    Step 5: Attach the Roof

    Cut the roof to a slight angle and secure it to the top of the box using screws.

    Step 6: Finish Your Birdhouse

    Sand the edges of your birdhouse to create a smooth finish. If desired, apply a coat of non-toxic paint or stain to protect the wood.

    Beyond the Basics: Adding Features for Bird Comfort

    For more advanced projects, consider incorporating features that enhance the birdhouse's comfort and safety:

    • Ventilation: Drill small holes in the back or sides to allow for airflow.
    • Drainage: Create a slight slope in the floor to ensure rainwater drains away.
    • Nesting Material: Add a small amount of nesting material, such as wood shavings or shredded bark, to the bottom of the nesting box.
    • Landing Platform: Install a small perch or platform on the front of the birdhouse, providing a place for birds to land before entering.

    Placement and Maintenance

    Once your birdhouse is complete, choose a strategic location for placement:

    • Facing South or East: Position the birdhouse so that the entrance faces south or east, providing sunlight and warmth.
    • Elevated and Secure: Place the birdhouse at least 5 feet above the ground, away from predators and potential dangers.
    • Shade: Provide some shade from direct sunlight, especially during hot summer months.

    Regular maintenance is essential to keep your birdhouse in optimal condition.

    • Clean Regularly: At the end of nesting season, clean out the birdhouse to remove old nesting material and debris.
    • Inspect for Damage: Check the birdhouse for signs of wear and tear, and make necessary repairs.
    • Replace When Needed: If the birdhouse becomes significantly damaged, replace it with a new one.

    Enjoy Your Feathered Guests

    With a little creativity and effort, you can build a welcoming home for birds that will bring joy and beauty to your garden. Keep an eye out for new feathered residents and appreciate the wonders of nature in your own backyard. Happy birdhouse building!

    Share:

    Budget-Friendly DIY Bedside Cabinet Plans with Downloadable PDF

    Budget-Friendly DIY Bedside Cabinet Plans with Downloadable PDF

    Budget-Friendly DIY Bedside Cabinet Plans with Downloadable PDF

    Enhance your bedroom's functionality and style with a DIY bedside cabinet. This project is not only budget-friendly, but it also allows you to create a unique piece that complements your decor perfectly. By following these detailed plans, you can build a sturdy and stylish bedside cabinet that will serve you for years to come.

    Before you start, gather your materials and tools. This project will require basic woodworking skills and common tools that are typically available at home improvement stores or online retailers.

    Materials

    • Plywood or MDF (1/2 inch or 3/4 inch thickness)
    • Wood glue
    • Wood screws (various lengths)
    • Finishing nails
    • Wood filler
    • Sandpaper (various grits)
    • Primer
    • Paint or stain (optional)
    • Hardware: drawer slides, knobs, hinges

    Tools

    • Miter saw or circular saw
    • Drill
    • Screwdriver
    • Hammer
    • Clamps
    • Tape measure
    • Pencil
    • Level
    • Safety glasses
    • Dust mask

    Downloadable PDF Plans

    For a complete set of detailed plans, including diagrams and cut lists, download the PDF file linked below. This will provide you with all the necessary information to build your own bedside cabinet.

    [Insert link to downloadable PDF file here]

    Step-by-Step Instructions

    Step 1: Cut the Wood

    Using your miter saw or circular saw, cut the plywood or MDF to the dimensions specified in the PDF plans. Make sure your cuts are accurate and precise to ensure a well-constructed cabinet. Remember to account for the thickness of the material when measuring and cutting.

    Step 2: Assemble the Cabinet Frame

    Apply wood glue to the edges of the cabinet sides and the top and bottom panels. Secure these pieces together with wood screws, ensuring they are flush and aligned. Use clamps to hold the frame together while the glue dries.

    Step 3: Construct the Drawer Box

    Assemble the drawer box using the same techniques as for the cabinet frame. Join the drawer sides, front, and back with wood glue and screws. Consider using rabbet joints for added strength and stability.

    Step 4: Install the Drawer Slides

    Attach the drawer slides to the sides of the drawer box and the inside of the cabinet frame, following the manufacturer's instructions. Ensure they are level and aligned for smooth drawer operation.

    Step 5: Attach the Drawer Front

    Secure the drawer front to the drawer box using wood glue and finishing nails. Align the drawer front with the sides, ensuring it is flush and even.

    Step 6: Install the Cabinet Doors (Optional)

    If you plan to add doors to your bedside cabinet, attach the hinges to the doors and cabinet sides. Position the hinges so that the doors open and close smoothly.

    Step 7: Install Hardware

    Install the drawer knobs, door handles, and any other hardware to complete the finishing touches.

    Step 8: Fill and Sand

    Use wood filler to cover any gaps, nail holes, or imperfections on the surface of the cabinet. Once the filler has dried, sand it smooth with sandpaper, starting with a coarse grit and gradually moving to finer grits to achieve a smooth finish.

    Step 9: Prime and Paint or Stain (Optional)

    Prime the cabinet with a suitable primer. Let it dry completely before applying a coat of paint or stain, if desired. Multiple thin coats will provide a smoother, more even finish.

    Tips for a Successful DIY Project

    • Measure Twice, Cut Once: Accuracy is crucial in woodworking, so carefully measure and double-check your measurements before cutting.
    • Use Clamps for Strong Joints: Clamps ensure the wood pieces are held securely together while the glue dries, creating strong and durable joints.
    • Sand Smoothly: Thorough sanding helps create a smooth and even surface for painting or staining, giving your cabinet a professional finish.
    • Don't Overtighten Screws: Overtightening screws can damage the wood. Tighten them firmly, but not excessively.
    • Safety First: Always wear safety glasses and a dust mask to protect your eyes and lungs from wood dust.

    Conclusion

    Building your own bedside cabinet is a rewarding and budget-friendly project that allows you to personalize your bedroom decor. By following these plans and tips, you can create a functional and stylish bedside cabinet that will enhance your bedroom's ambiance and provide a convenient storage solution for your essential items.

    Share:

    Diy guide to making a wooden desk with a fold-down feature

    Diy guide to making a wooden desk with a fold-down feature

    Building a Wooden Desk with a Fold-Down Feature: A Comprehensive Guide

    A fold-down desk is a versatile piece of furniture that can save space and be a functional addition to any room. This guide will walk you through the steps of building your own wooden desk with a fold-down feature. By following these instructions carefully, you'll be equipped to create a custom-made desk that suits your needs and enhances your workspace.

    Materials

    Before you start, gather the necessary materials and tools to ensure a smooth and efficient building process. You'll need:

    Wood

    • Two pieces of plywood for the desk top (the size will depend on your desired dimensions)
    • One piece of plywood for the base (the size will depend on the width of the desk top and the desired height of the desk)
    • Two pieces of hardwood for the legs (choose a length that matches the desired height of the desk)
    • One piece of hardwood for the support beam (the length will depend on the width of the desk top)
    • One piece of hardwood for the hinge support (the size will depend on the desired size of the fold-down feature)
    • One piece of hardwood for the handle (the size will depend on your preference)

    Hardware

    • Heavy-duty hinges (2)
    • Wood screws (various sizes)
    • Wood glue
    • Wood filler
    • Finishing nails
    • Clamps

    Tools

    • Circular saw or table saw
    • Power drill
    • Screwdriver
    • Tape measure
    • Pencil
    • Level
    • Sandpaper (various grits)
    • Safety glasses
    • Dust mask
    • Work gloves

    Step-by-Step Construction

    Now that you have all the materials and tools, let's begin building your fold-down desk:

    Step 1: Cut the Wood

    Begin by cutting all the wood pieces to size according to your design. Use a circular saw or table saw for precise cuts. Ensure your measurements are accurate to avoid any issues later on.

    Step 2: Build the Base

    The base will provide structural support for your desk. Attach the two legs to the base using wood screws and glue. Ensure the legs are placed at a distance that will allow the desk top to fold down comfortably.

    Step 3: Create the Hinge Support

    The hinge support will be crucial for the fold-down feature. Cut a piece of hardwood to the desired width of the desk top. Attach the hinge support to the base using wood screws and glue. Ensure the hinge support is positioned securely and is flush with the edge of the base.

    Step 4: Install the Hinges

    Attach the hinges to the hinge support using wood screws. The hinges should be positioned near the front edge of the desk top, allowing it to fold down smoothly. Be sure to pre-drill holes for the screws to prevent splitting the wood.

    Step 5: Create the Desk Top

    Attach the two pieces of plywood for the desk top using wood glue and screws. Ensure the edges are aligned and flush. You can add a decorative edge to the desk top using wood molding if desired.

    Step 6: Attach the Desk Top to the Hinges

    Carefully attach the desk top to the hinges using wood screws. Ensure that the desk top aligns correctly with the hinge support and folds down smoothly.

    Step 7: Install the Support Beam

    The support beam will provide additional stability to the fold-down feature. Attach the support beam to the underside of the desk top, ensuring it aligns with the hinge support. Use wood screws and glue to secure the support beam in place.

    Step 8: Add the Handle

    For easy operation, attach the handle to the desk top. Place the handle in a convenient location that allows for comfortable opening and closing of the desk. Secure the handle using wood screws or finishing nails.

    Step 9: Finishing Touches

    After assembling the desk, apply wood filler to any holes or imperfections in the wood. Once the filler has dried, sand the entire desk using sandpaper of various grits. Start with a coarse grit to remove any rough areas and then progress to a finer grit for a smooth finish.

    Step 10: Staining and Sealing

    To enhance the appearance and protect the wood, apply stain and sealant to the desk. Choose a stain color that complements your décor and apply it evenly to the entire surface. Allow the stain to dry thoroughly before applying a sealant for durability and protection.

    Safety Precautions

    Safety should always be a priority when working with wood and power tools. Follow these precautions:

    • Wear safety glasses to protect your eyes from flying debris.
    • Use a dust mask to avoid inhaling wood dust, which can be harmful to your health.
    • Wear work gloves to protect your hands from splinters and sharp edges.
    • Use clamps to secure wood pieces during cutting and assembly. This will help prevent accidents and ensure stability.
    • Always follow the manufacturer's instructions for using power tools.
    • Keep the workspace clean and tidy to prevent tripping hazards.
    • Work in a well-ventilated area to avoid the accumulation of dust and fumes.
    • Be aware of your surroundings and take breaks when needed.

    Customization Tips

    To personalize your desk, explore these customization options:

    • Add a shelf: Incorporate a shelf beneath the fold-down section to store books, supplies, or decorative items.
    • Install a drawer: Add a drawer to the base of the desk for additional storage space.
    • Use different wood species: Experiment with various wood types for a unique look and feel. For instance, maple, cherry, or walnut would create a visually appealing and durable desk.
    • Decorate the desk top: Add a layer of paint, wallpaper, or fabric to the desk top to enhance its appearance and match your personal style.
    • Incorporate lighting: Add a desk lamp or built-in lighting to improve visibility and create a more inviting workspace.

    Conclusion

    By following this comprehensive guide, you can create a beautiful and functional wooden desk with a fold-down feature. Remember to pay attention to detail, utilize safety precautions, and personalize your design to meet your unique needs and preferences. The end result will be a custom-made desk that enhances your workspace and brings joy to your home.

    Share:

    Woodworking project: building a diy magic box

    Woodworking project: building a diy magic box

    Building a DIY Magic Box: A Fun Woodworking Project

    Hey there, woodworking enthusiasts! Are you looking for a fun and creative project that's a little bit magical? Well, look no further than building your own DIY magic box! This project is perfect for beginners and seasoned woodworkers alike, and it's a great way to impress your friends and family with your crafting skills. Plus, it's a perfect opportunity to let your inner child run wild and embrace the magic of illusion!

    What is a Magic Box?

    A magic box is a simple yet clever contraption that uses basic principles of physics to create illusions. It's essentially a box with a hidden compartment or a secret mechanism that allows you to make objects appear and disappear, change their size, or even seem to levitate. You can use it for all sorts of tricks, from classic magic illusions like pulling a rabbit out of a hat to creating your own unique and quirky routines.

    Choosing Your Materials

    The beauty of this project is that you can customize it to your liking. You can use any type of wood you have lying around, from scrap pieces to fancy hardwoods. Here's a list of the materials you'll need, keeping in mind you can adjust based on your desired design and complexity:

    • Wood of your choice (1/2" to 3/4" thick)
    • Wood glue
    • Wood screws or nails
    • Sandpaper (various grits)
    • Paint or stain (optional)
    • Hardware for your secret mechanism (hinges, magnets, slides, etc.)
    • Any other embellishments you desire (knobs, decorative trim, etc.)

    Choosing the Right Wood

    If you're a beginner, I recommend sticking with softwoods like pine or fir, as they're easier to work with. For a more elegant and durable magic box, you could opt for hardwoods like oak, cherry, or maple. If you're using scrap wood, make sure it's free of knots and cracks for a smooth and sturdy finish.

    Designing Your Magic Box

    Now for the fun part! Let your imagination run wild and design a box that fits your vision. You can choose a simple box with a hidden compartment, a box with a tilting panel that reveals a secret space, or a box with a drawer that slides out with a hidden mechanism. The possibilities are endless!

    Sketching Your Ideas

    Start by sketching out a few ideas on paper. Consider the size and shape of the box, the location of the hidden compartment or mechanism, and the overall aesthetic you want to achieve. A few rough sketches will help you visualize your ideas and get a better understanding of how the box will be constructed.

    Creating a Blueprint

    Once you've settled on a design, create a detailed blueprint with accurate measurements. This will serve as your guide during the construction process. If you're not comfortable drawing by hand, you can use free online drafting tools to create a digital blueprint.

    Building the Magic Box: Step-by-Step Instructions

    Now it's time to put your design to the test! Follow these general steps, adapting them to your specific design:

    Step 1: Cut the Wood

    Using your blueprint as a guide, cut the pieces of wood to the desired size. You can use a saw, jigsaw, or other woodworking tools, depending on your preference and the complexity of your design. Make sure to measure carefully and cut with precision for a clean and professional finish.

    Step 2: Assemble the Box

    Glue and screw or nail the pieces of wood together to form the box. Make sure to align the pieces correctly and use clamps to hold them in place while the glue dries. If your design includes a lid, use hinges to attach it to the box.

    Step 3: Create the Secret Compartment

    This is where your creativity comes in! If you're going for a simple hidden compartment, simply create a separate box that fits snugly inside the main box. Attach it to the inside of the box with hinges or magnets. For a more complex design, you can create a tilting panel, a sliding drawer with a hidden mechanism, or any other secret feature you can dream up.

    Step 4: Add Finishing Touches

    Once the box is assembled, sand down the edges and smooth out any imperfections. If desired, you can paint or stain the box to give it a unique look. You can also add decorative details like knobs, handles, or trim to make it more visually appealing.

    Making Your Magic Box "Magical"

    Now that your box is built, it's time to add some magic to it! Here are some ideas for creating amazing illusions:

    • Vanishing Acts: Use a hidden compartment to make objects disappear and reappear. Place an object in the compartment, close the box, and then open it to reveal the object has vanished! You can use simple tricks like a slight movement or distraction to make the object seem to disappear.
    • Levitation: Create a box that appears to make objects levitate. Use a hidden mechanism like a lever or pulley system to move an object up and down within the box. Make sure to disguise the mechanism well so it remains invisible during the trick.
    • Size Changes: Build a box with a sliding panel that reveals a compartment with an object that is larger or smaller than the one that was placed in the box. This creates the illusion of the object changing size.
    • Color Changes: Use a hidden compartment to reveal an object with a different color than the one that was placed in the box. Use a simple mechanism like a rope and pulley to switch the objects behind the scenes.

    Practicing Your Tricks

    Once you've come up with your illusions, it's time to practice! Practice makes perfect, and the more you practice your tricks, the more confident you will be when performing them. Remember to focus on the presentation and timing of your tricks to make them even more impactful. Use your practice time to refine your movements and create a showstopping performance.

    Sharing Your Magic Box

    Once you've mastered your tricks, you can share your magic box with friends and family. Share your knowledge, share your love of woodworking, and share the wonder of magic! You can also consider entering your magic box in a local competition or even selling it to other magic enthusiasts.

    Safety Tips

    Before you start building your magic box, make sure you understand the safety precautions associated with woodworking tools. Always wear eye protection and dust masks, and ensure you are using the correct tools for the job. Also, be aware of potential hazards like sharp edges and moving parts. Always work in a well-lit and ventilated area, and be mindful of your surroundings.

    Remember, woodworking is a fun and rewarding hobby that can bring you many years of enjoyment. With a little creativity and patience, you can build a DIY magic box that will amaze your friends and family and inspire you to explore the world of magic and illusion. So, what are you waiting for? Get your tools ready and let's get started!

    Share:

    How to Make a Birdhouse for Spring Use with Proper Ventilation

    How to Make a Birdhouse for Spring Use with Proper Ventilation

    Build a Birdhouse for Spring with Proper Ventilation

    Spring is the perfect time to welcome feathered friends to your backyard with a cozy and well-ventilated birdhouse. A well-designed birdhouse not only provides shelter but also ensures a healthy and comfortable environment for nesting birds. Follow these steps to build a birdhouse that will attract birds and promote healthy nesting.

    Choosing the Right Materials

    Start by selecting materials that are both durable and safe for birds. Cedar and redwood are excellent choices for birdhouses as they are naturally resistant to decay and insects. However, avoid pressure-treated lumber as it may contain chemicals harmful to birds. You'll also need screws, glue, and paint or stain, if desired.

    Design and Construction

    Plan the Dimensions

    The size and shape of your birdhouse will depend on the type of birds you want to attract. Research the preferred dimensions of your target species. Consider the size of the entrance hole â€" too large and larger birds might bully smaller ones, too small and the desired birds might not fit.

    Building the Base

    Cut two pieces of wood for the base of your birdhouse, ensuring they are slightly wider than the desired width of the house. Glue and screw these pieces together to create a sturdy base.

    Assembling the Walls

    Cut four pieces of wood for the walls, ensuring their height is sufficient for the birdhouse. Glue and screw these pieces to the base, creating a box-like structure. Leave the top open for now.

    Adding the Roof

    Cut two pieces of wood to make the roof. These should be slightly wider than the walls and have a slight pitch for drainage. Glue and screw the roof pieces to the top of the walls. You can use a piece of scrap wood to create an overhang for additional protection from rain.

    Creating Proper Ventilation

    Ventilation is crucial for preventing mold and mildew buildup inside the birdhouse. Incorporate these elements:

    • Ventilation Holes: Drill several small holes in the back or sides of the birdhouse, approximately 1/2 inch in diameter, to allow air circulation.
    • Raised Floor: Instead of attaching the floor directly to the base, add a small space between the floor and the base. This creates an air gap that will improve ventilation. Use small wood blocks to elevate the floor.

    Final Touches

    To complete your birdhouse, add the following:

    • Entrance Hole: Carefully cut the entrance hole using a drill or jigsaw. Ensure the hole is smooth and free of sharp edges.
    • Perch: A small perch on the front edge of the entrance will make it easier for birds to access the birdhouse. Attach a small branch or a piece of dowel to the front of the house.
    • Paint or Stain: If desired, you can paint the birdhouse with bird-friendly colors and seal it with a non-toxic sealant to protect it from the elements.

    Placing Your Birdhouse

    Select a location that provides protection from the elements, such as under the eaves of a house or beneath a tree. Ensure the birdhouse is at least 5 feet off the ground to keep predators at bay.

    With a little effort and careful planning, you can build a welcoming and healthy birdhouse that will attract birds to your yard. Your birdhouse will be a delightful addition to your garden, providing a place for birds to nest and raise their young while contributing to the balance of your local ecosystem. Enjoy watching your feathered friends build a home and raise their families in your well-crafted birdhouse!

    Share:

    DIY Outdoor Compost Bin: Plans and Downloadable Guide

    DIY Outdoor Compost Bin: Plans and Downloadable Guide

    DIY Outdoor Compost Bin: Plans and Downloadable Guide

    Are you ready to embrace a more sustainable lifestyle by turning your kitchen scraps and yard waste into nutrient-rich compost? Building your own outdoor compost bin is a rewarding project that's both environmentally friendly and cost-effective. This guide will walk you through the steps, providing you with clear plans and a downloadable guide to help you create your very own compost haven.

    Why Build Your Own Compost Bin?

    Composting offers numerous benefits for your garden and the environment. Here are just a few reasons to consider building your own compost bin:

    • Reduce Waste: Divert organic materials from landfills, where they decompose and release harmful methane gas.
    • Free Fertilizer: Create a natural, nutrient-rich fertilizer for your plants, saving money on store-bought options.
    • Improve Soil Health: Compost improves soil structure, aeration, and water retention, resulting in healthier plants.
    • Sustainable Living: Embrace a more sustainable lifestyle by closing the loop and using your own waste to nourish your garden.

    Choosing the Right Compost Bin Design

    The first step is to choose a compost bin design that suits your needs and space. Here are some popular options:

    Three-Bin System

    This system consists of three bins: one for fresh materials, one for composting, and one for finished compost. This allows for a continuous composting process, ensuring you always have a supply of compost ready for your garden.

    Tumbler Composter

    Tumbler composters are rotating barrels that make composting easier and faster. They provide good aeration and mix the materials evenly, but they can be more expensive than other options.

    DIY Pallet Compost Bin

    This simple design uses reclaimed pallets to create a sturdy and attractive compost bin. It's a great option for those looking for a budget-friendly and eco-friendly solution.

    Materials and Tools

    Once you've chosen your design, gather the necessary materials and tools:

    • Wood: Use treated lumber for outdoor durability, or choose a naturally rot-resistant wood like cedar.
    • Hardware: Screws, nails, hinges (for doors or lids), and corner brackets for added stability.
    • Tools: Saw, drill, tape measure, level, hammer, safety glasses, and gloves.

    Building Your Compost Bin

    Now, it's time to construct your compost bin following these steps:

    1. Cut the Wood: Measure and cut the wood according to your chosen design.
    2. Assemble the Frame: Join the wood pieces using screws or nails to form the bin's frame.
    3. Add Optional Features: Consider adding features like doors or lids for easier access and ventilation.
    4. Secure the Construction: Reinforce corners and joints with corner brackets to ensure a stable and sturdy compost bin.

    Composting Basics

    With your compost bin built, learn the basics of composting:

    • Brown Materials (Carbon): Dried leaves, twigs, straw, and shredded cardboard.
    • Green Materials (Nitrogen): Kitchen scraps (fruit and vegetable peels), coffee grounds, tea bags, and grass clippings.
    • Moisture: Keep the compost moist, like a wrung-out sponge.
    • Aeration: Turn the compost regularly to ensure proper oxygen flow.

    Downloadable Guide

    For detailed step-by-step instructions, diagrams, and materials list, download our comprehensive DIY compost bin guide. This resource will provide you with everything you need to confidently build your own compost bin. [Link to downloadable guide]

    Conclusion

    Building your own compost bin is an excellent way to reduce waste, improve your garden's health, and contribute to a more sustainable lifestyle. By following these plans and using our downloadable guide, you can create a compost haven that will enrich your garden and the environment. So, gather your materials, grab your tools, and get ready to compost your way to a healthier and more sustainable future!

    Share:

    Popular Posts

    Search This Blog

    Powered by Blogger.

    Blog Archive

    Blog Archive

    Recent Posts

    Sample Text


    Pages